As of December 31st, 2023 ThreadFix 2.X has reached End of Life and is no longer supported. For any further information please contact the Success and Implementation team.
Automated Defect Creation
- Hector Ruiz (Unlicensed)
- Kyle Pippin (Unlicensed)
Owned by Hector Ruiz (Unlicensed)
Below are the steps to incorporate the automated defect creation process.
- Create a Defect Tracker instance by going to Integrations -> Defect Trackers (refer to the Software Defect Tracker page for more info).
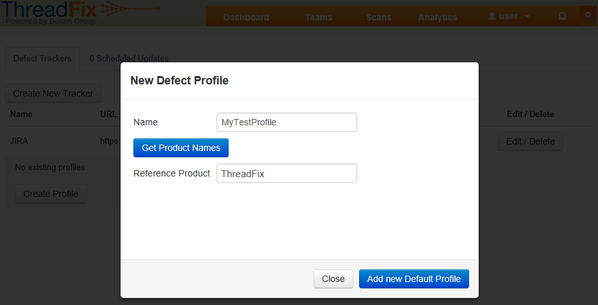
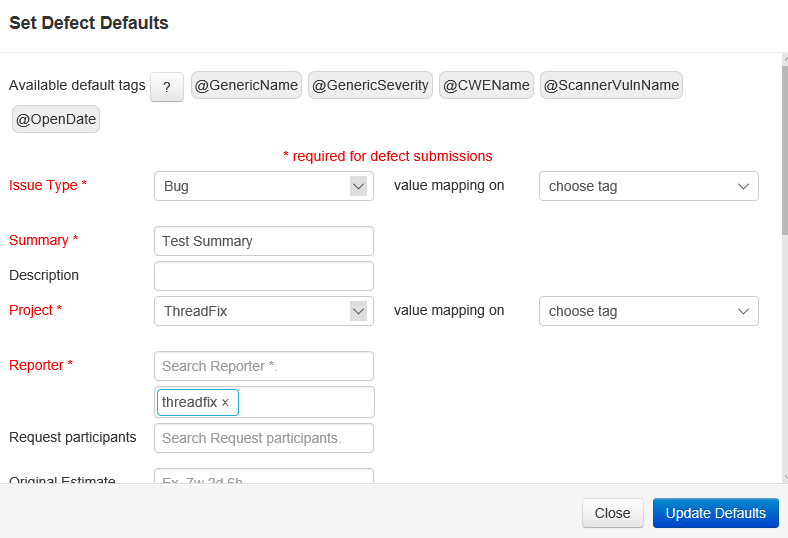
- Create a defect profile which fills out all required fields for that configured defect tracker by clicking the “Show Default Profiles” button, then clicking the “Create Profile” button.
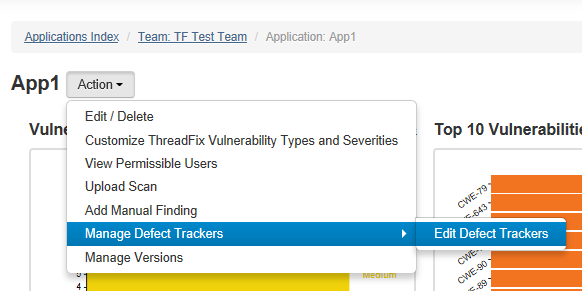
- Open the Application Detail page for the application you wish to configure automated defect creation on and select the Top Action Menu -> Manage Defect Trackers -> Edit Defect Trackers.
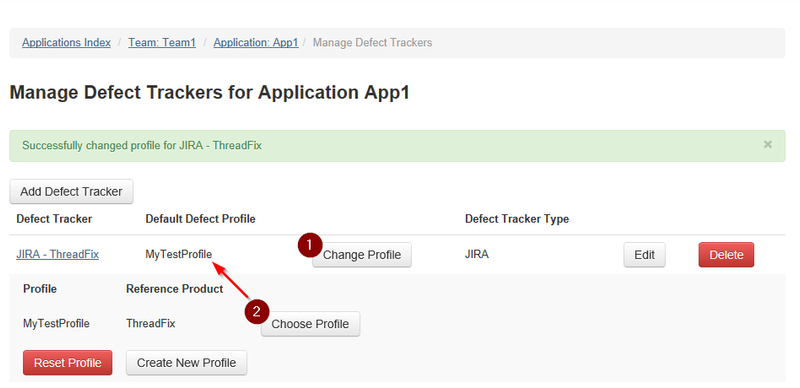
- Click the “Add Defect Tracker” button to select the configured defect tracker you would like associated to this application.

- Click the “Change Profile” button to expand all configured profiles for this defect tracker and select a profile to be the default profile (ensure you select a default profile that fills all required fields).
- Go to the Manage Policies page under Customize -> Policies.
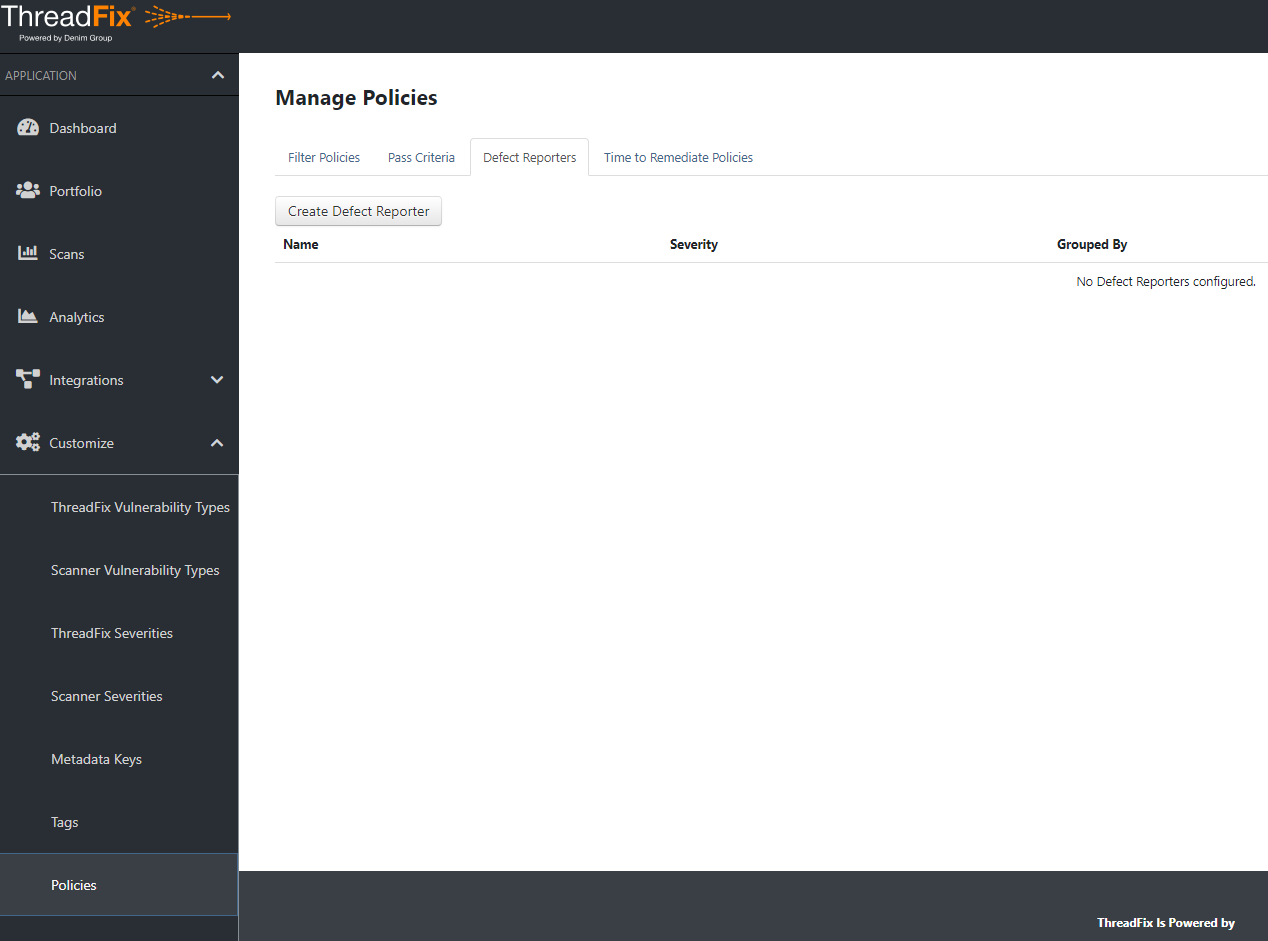
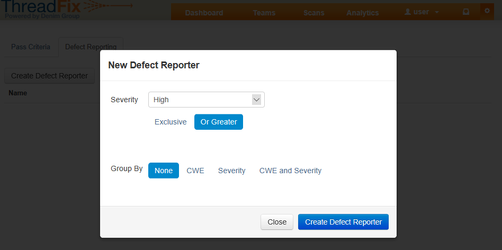
- Select the Defect Reporters tab, click the “Create Defect Reporter” button and select the criterion for which you would like to auto-create defects.
- First, by selecting the Severity you would like automated defects to be created for, you can dictate when to create a defect. For example, if you select Severity "High" and chose the "Or Greater" option, a defect will be created anytime a new vulnerability is introduced with a High or Critical Severity.
- The Group By options let you choose to bundle similar vulnerabilities or severities into a single defect to reduce the potential noise created by a bad check-in or a particularly troubled new feature. Choose between no grouping, bundling by identical CWE's, bundling by identical Severities, or bundling by identical CWE's per severity. If you choose "CWE and Severity", for example, all Critical XSS vulnerabilities would be grouped into a single defect with all High XSS vulnerabilities grouped into a separate defect.
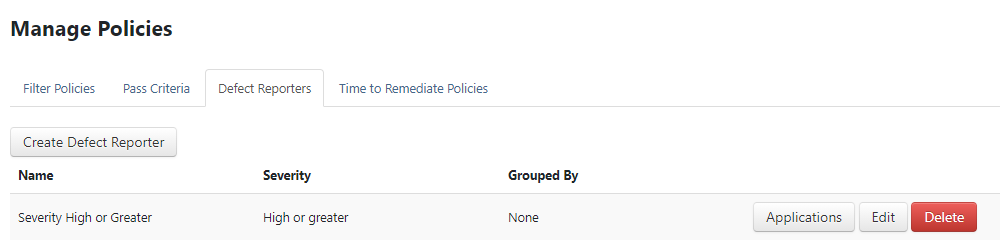
- Click the “Applications” button for the policy you just defined.
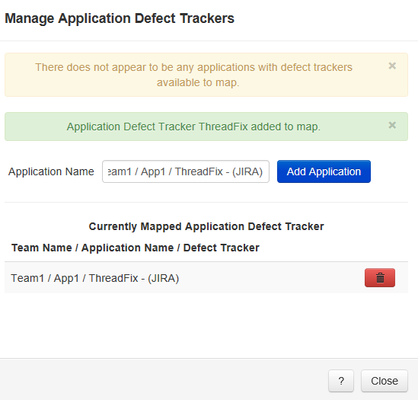
- Start typing the desired application name you wish to add, select it from the drop-down list, and click the 'Add Application' button;. Repeat if you want to add more applications.
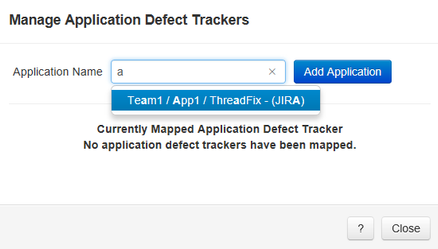
- You'll receive confirmation that the defect tracker was added.
After completing the above steps and then uploading a new scan into the ThreadFix application, ThreadFix will submit defects for all vulnerabilities that meet the specified criterion in the application (i.e., existing vulnerabilities and those created by the new scan).
www.threadfix.it | www.coalfire.com
Copyright © 2024 Coalfire. All rights reserved.
This Information Security Policy is CoalFire - Public: Distribution of this material is not limited.