📙 You will learn
How to generate a Checkmarx report and upload it to ThreadFix.
Prerequisites
Audience: IT Professional
Difficulty: Basic
Time needed: Approximately 10 minutes
Tools required: N/A
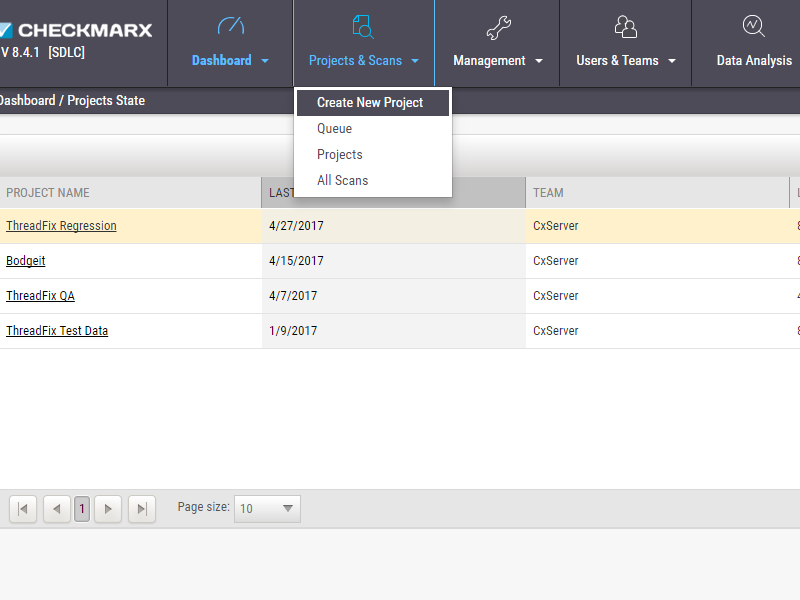
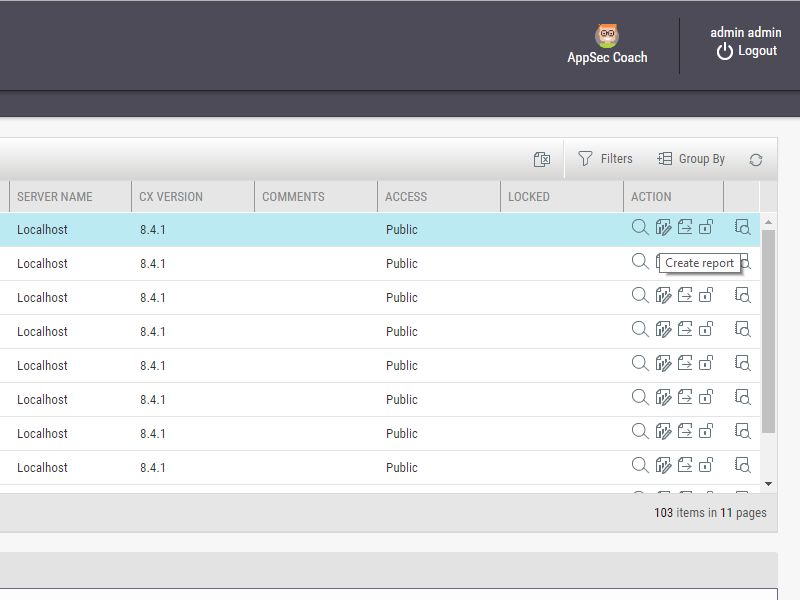
Generate Results
After logging into the Checkmarx instance, there are two options for obtaining a report:
Download a report from existing results
Queue a scan to create results for a report:
Select
...
...
...
...
from the options list.
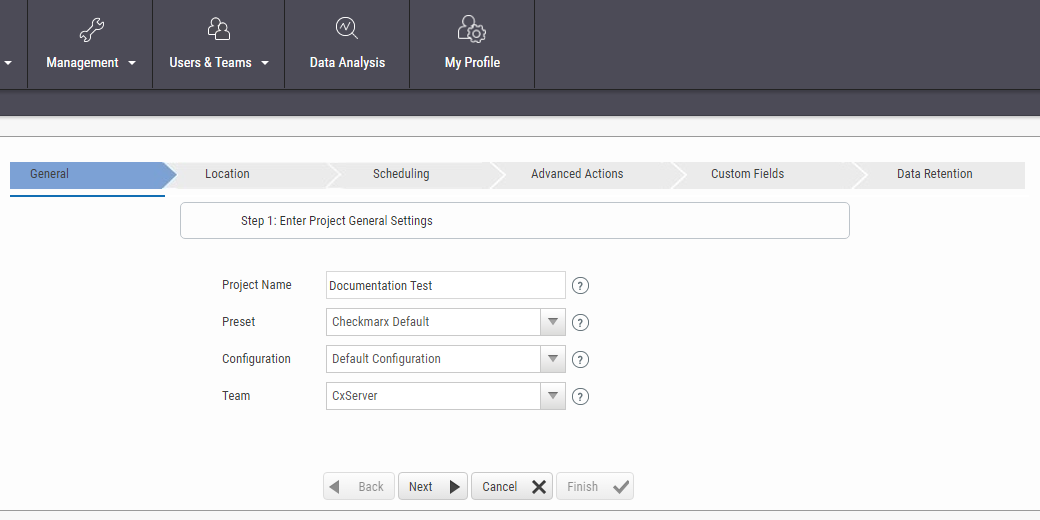
Enter
...
...
click the Next button.
Zip up the source code to be scanned, select it and
...
...
.

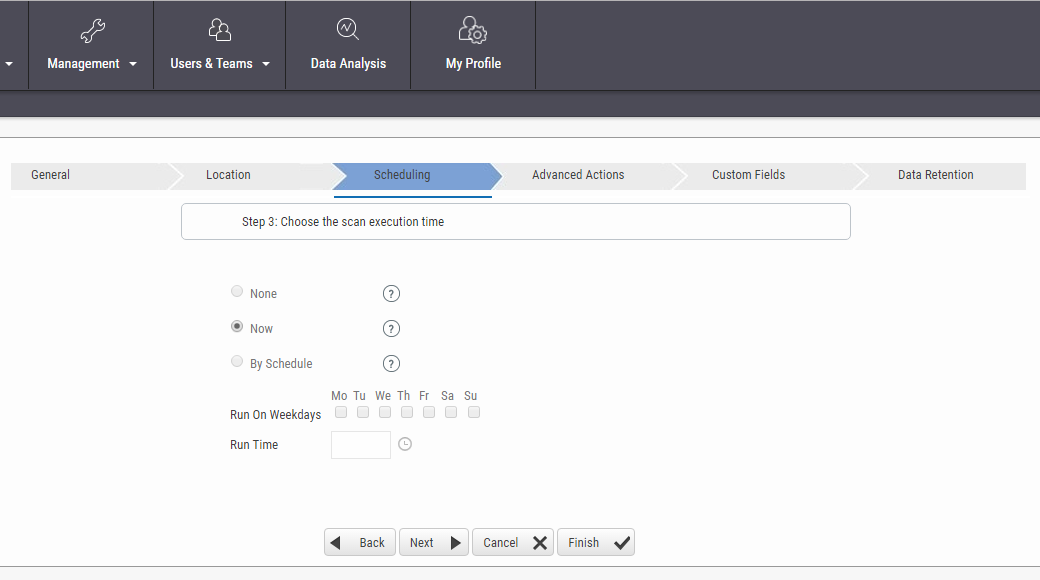
...
...
...
...
and click the Finish button.
After the scan has finished, select the Project & Scans
...
...
from the drop-down options.
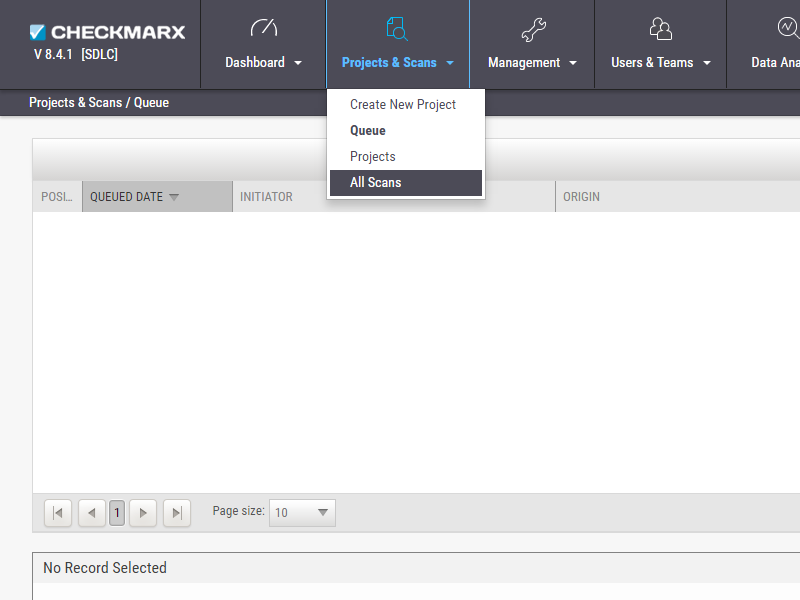
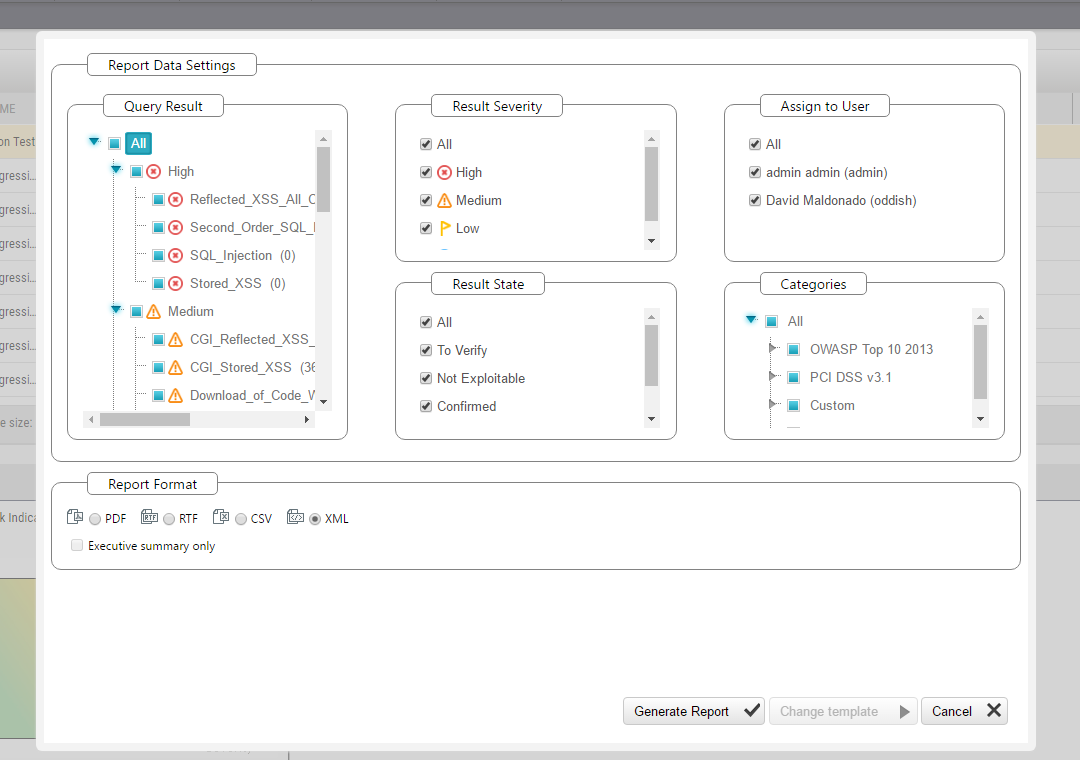
Select
...
...
...
.
...
...
...
...
...
...
Upload Results
After generating
...
...
Portfolio page, found on the Navigation sidebar under the Application sub-menu.
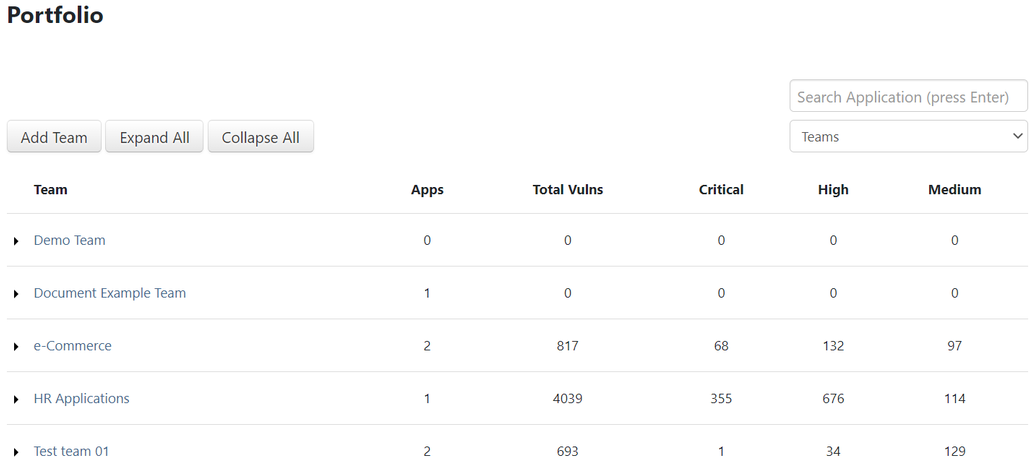
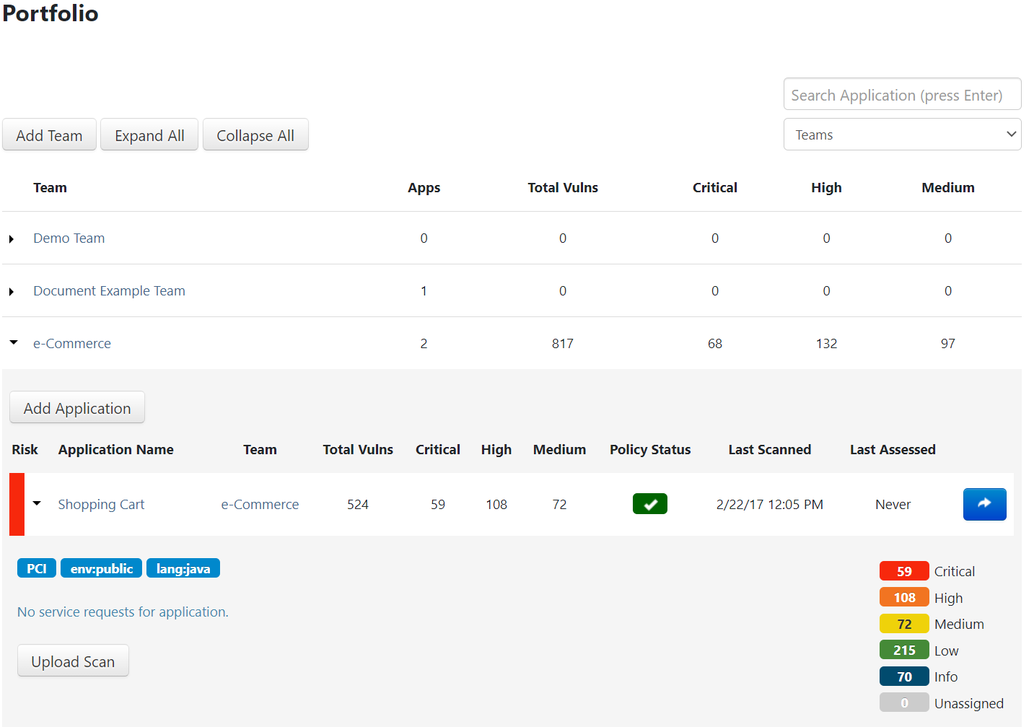
Expand the Team
...
...
.
...
...
...
.

...
...
...
...
.
Table of Contents
| Table of Contents |
|---|