ThreadFix gives you the ability to "tag" applications, vulnerabilities, and comments to provide another method of manipulating the application vulnerability data you view.
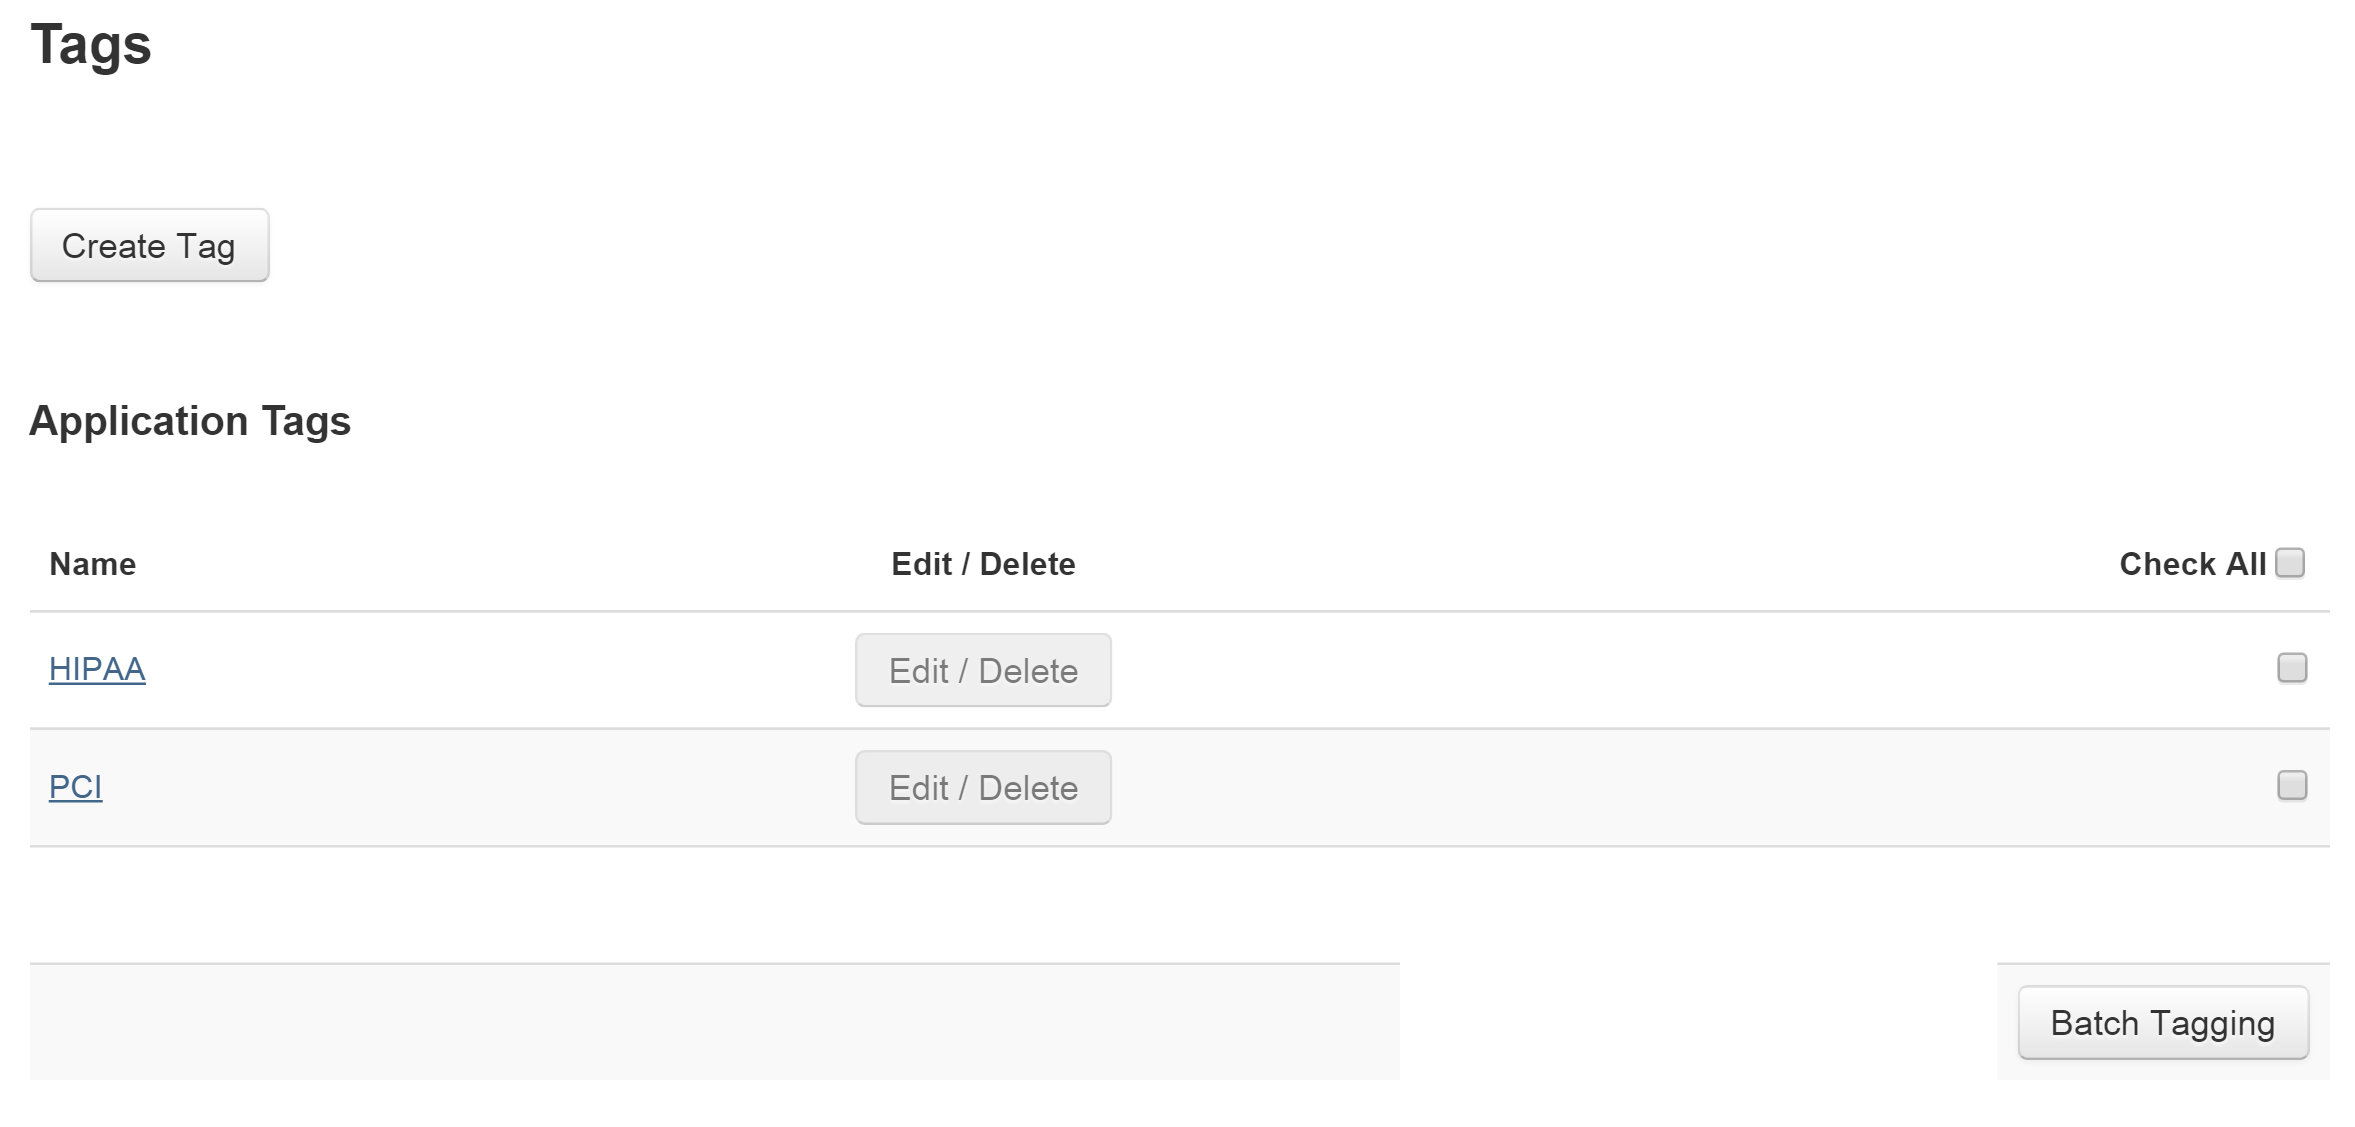
ThreadFix has two predefined tags: HIPAA (Health Insurance Portability and Accountability Act) and PCI (Payment Card Industry, specifically the PCI’s Data Security Standard, or DSS). These can segregate applications with regulatory compliance demands in the medical or payment-processing spheres from the rest of the organization’s application portfolio. When you tag applications with the HIPAA or PCI tag, they become viewable in the Compliance Report section of Analytics.
ThreadFix’s tagging mechanisms are also useful beyond PCI and HIPAA. You can also create custom tags, organizing your applications, vulnerabilities and comments according to whatever schema you wish. You will see this demonstrated in the following examples of tag creation and assignment.
Below are articles describing each type of tag:
Application Tags
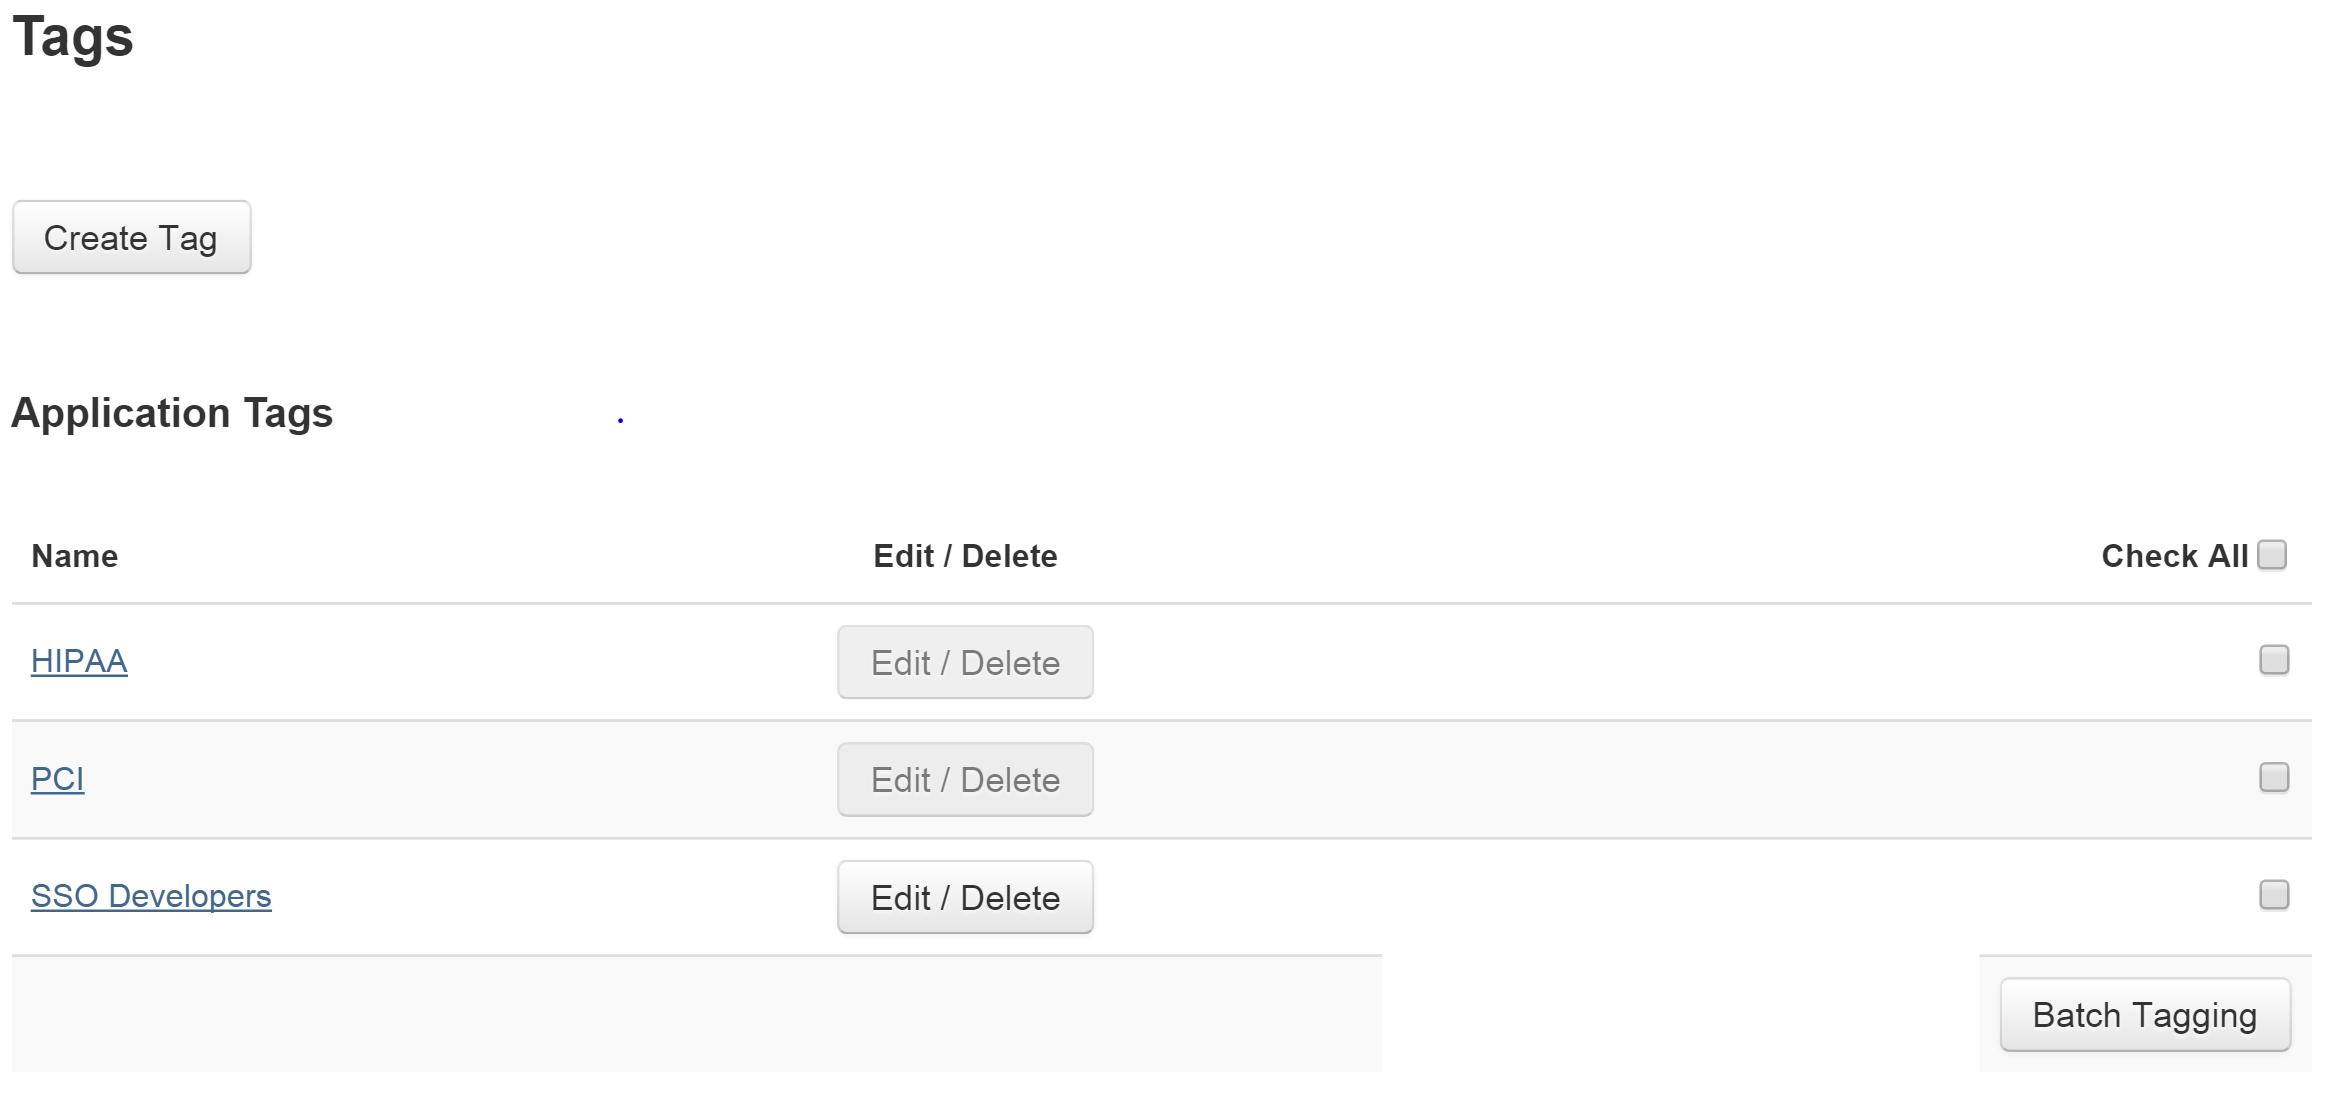
To create a custom application-level tag in ThreadFix, click the Create Tag button at the top of the page.
This displays a modal dialog. Enter the name of your new tag, and then choose from the dropdown the type of tag you to create: APPLICATION, VULNERABILITY, or COMMENT. In this example, we are creating a tag for an application, with a tag name of "SSO developers."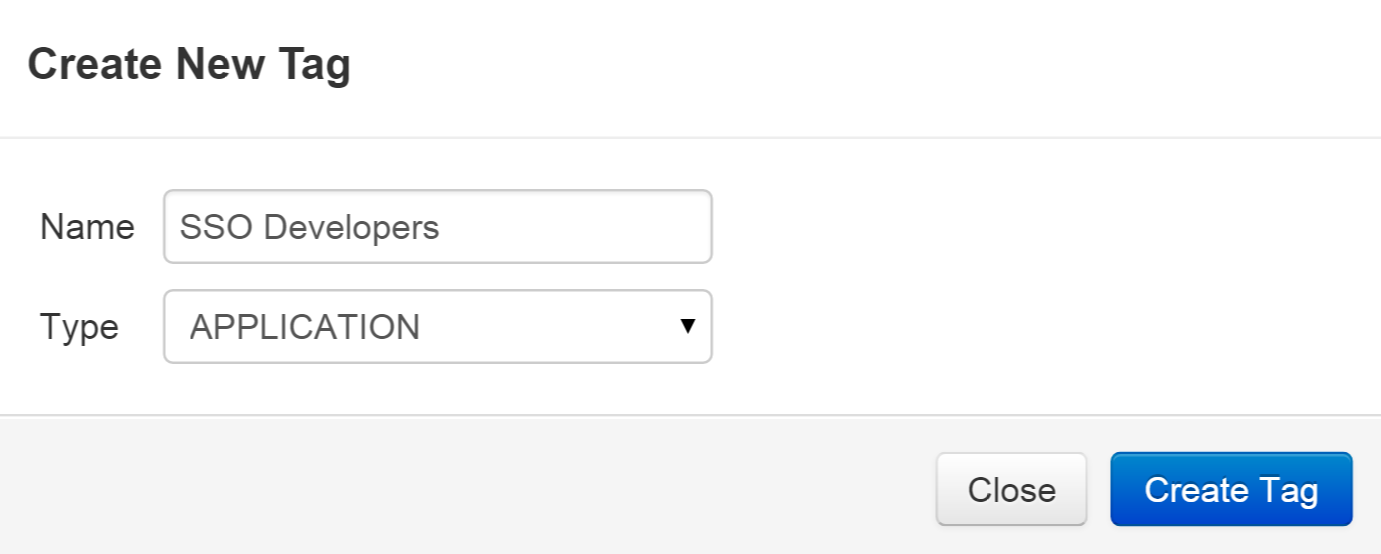
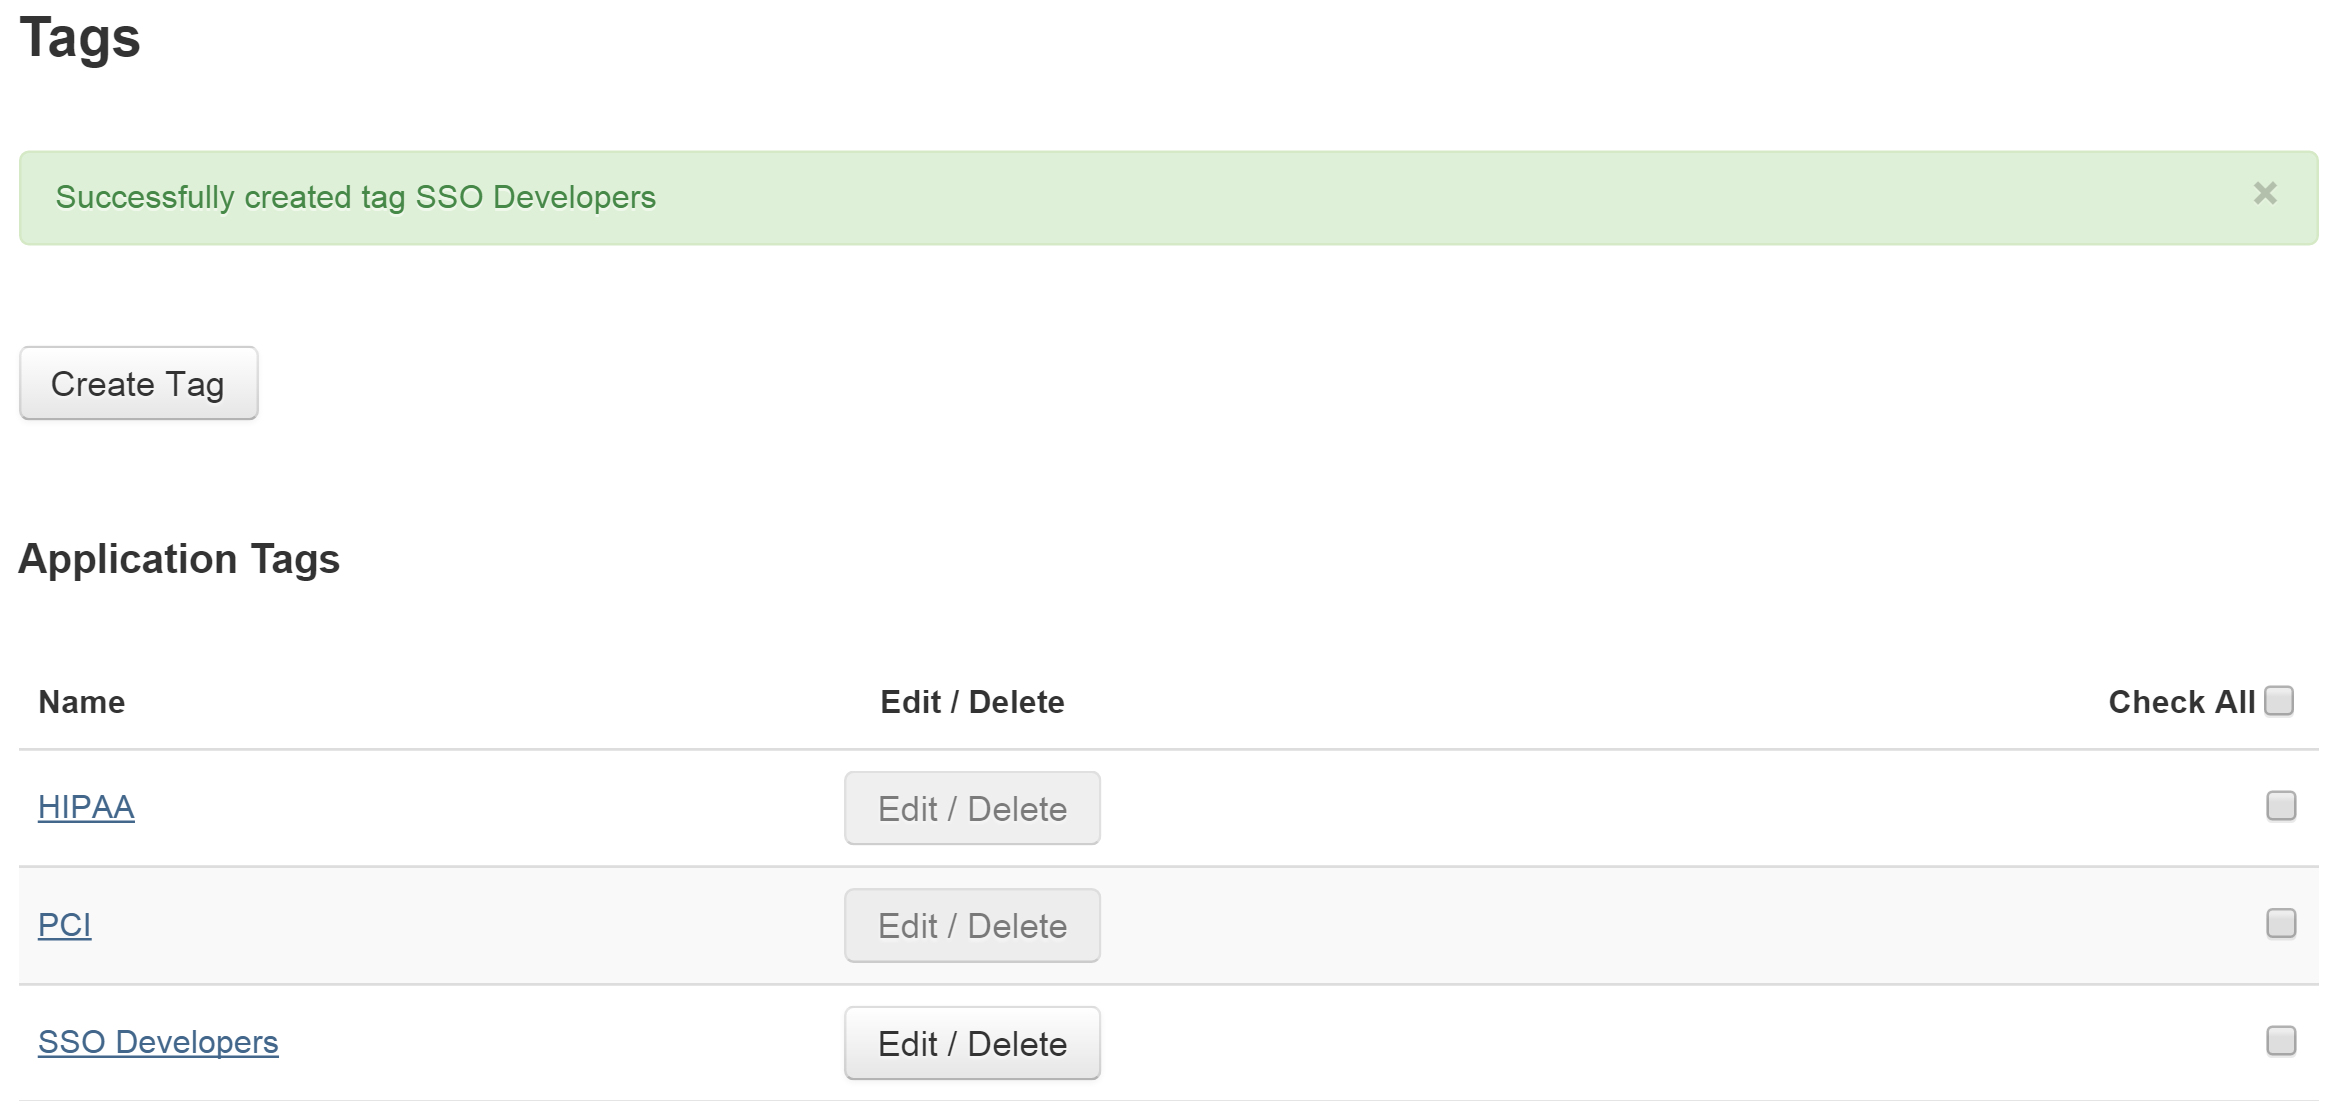
Click Create Tag. This closes the dialog, displays a success message and adds your new tag to the list of tags available.
Batch Tagging
Now that you have a new tag, you need to attach it to an application. ThreadFix has the capability of applying multiple tags to multiple applications at once, through Batch Tagging**. Select your new tag, using the checkbox to the right and click the Batch Tagging button.* This takes you to the Batch Tagging* page.
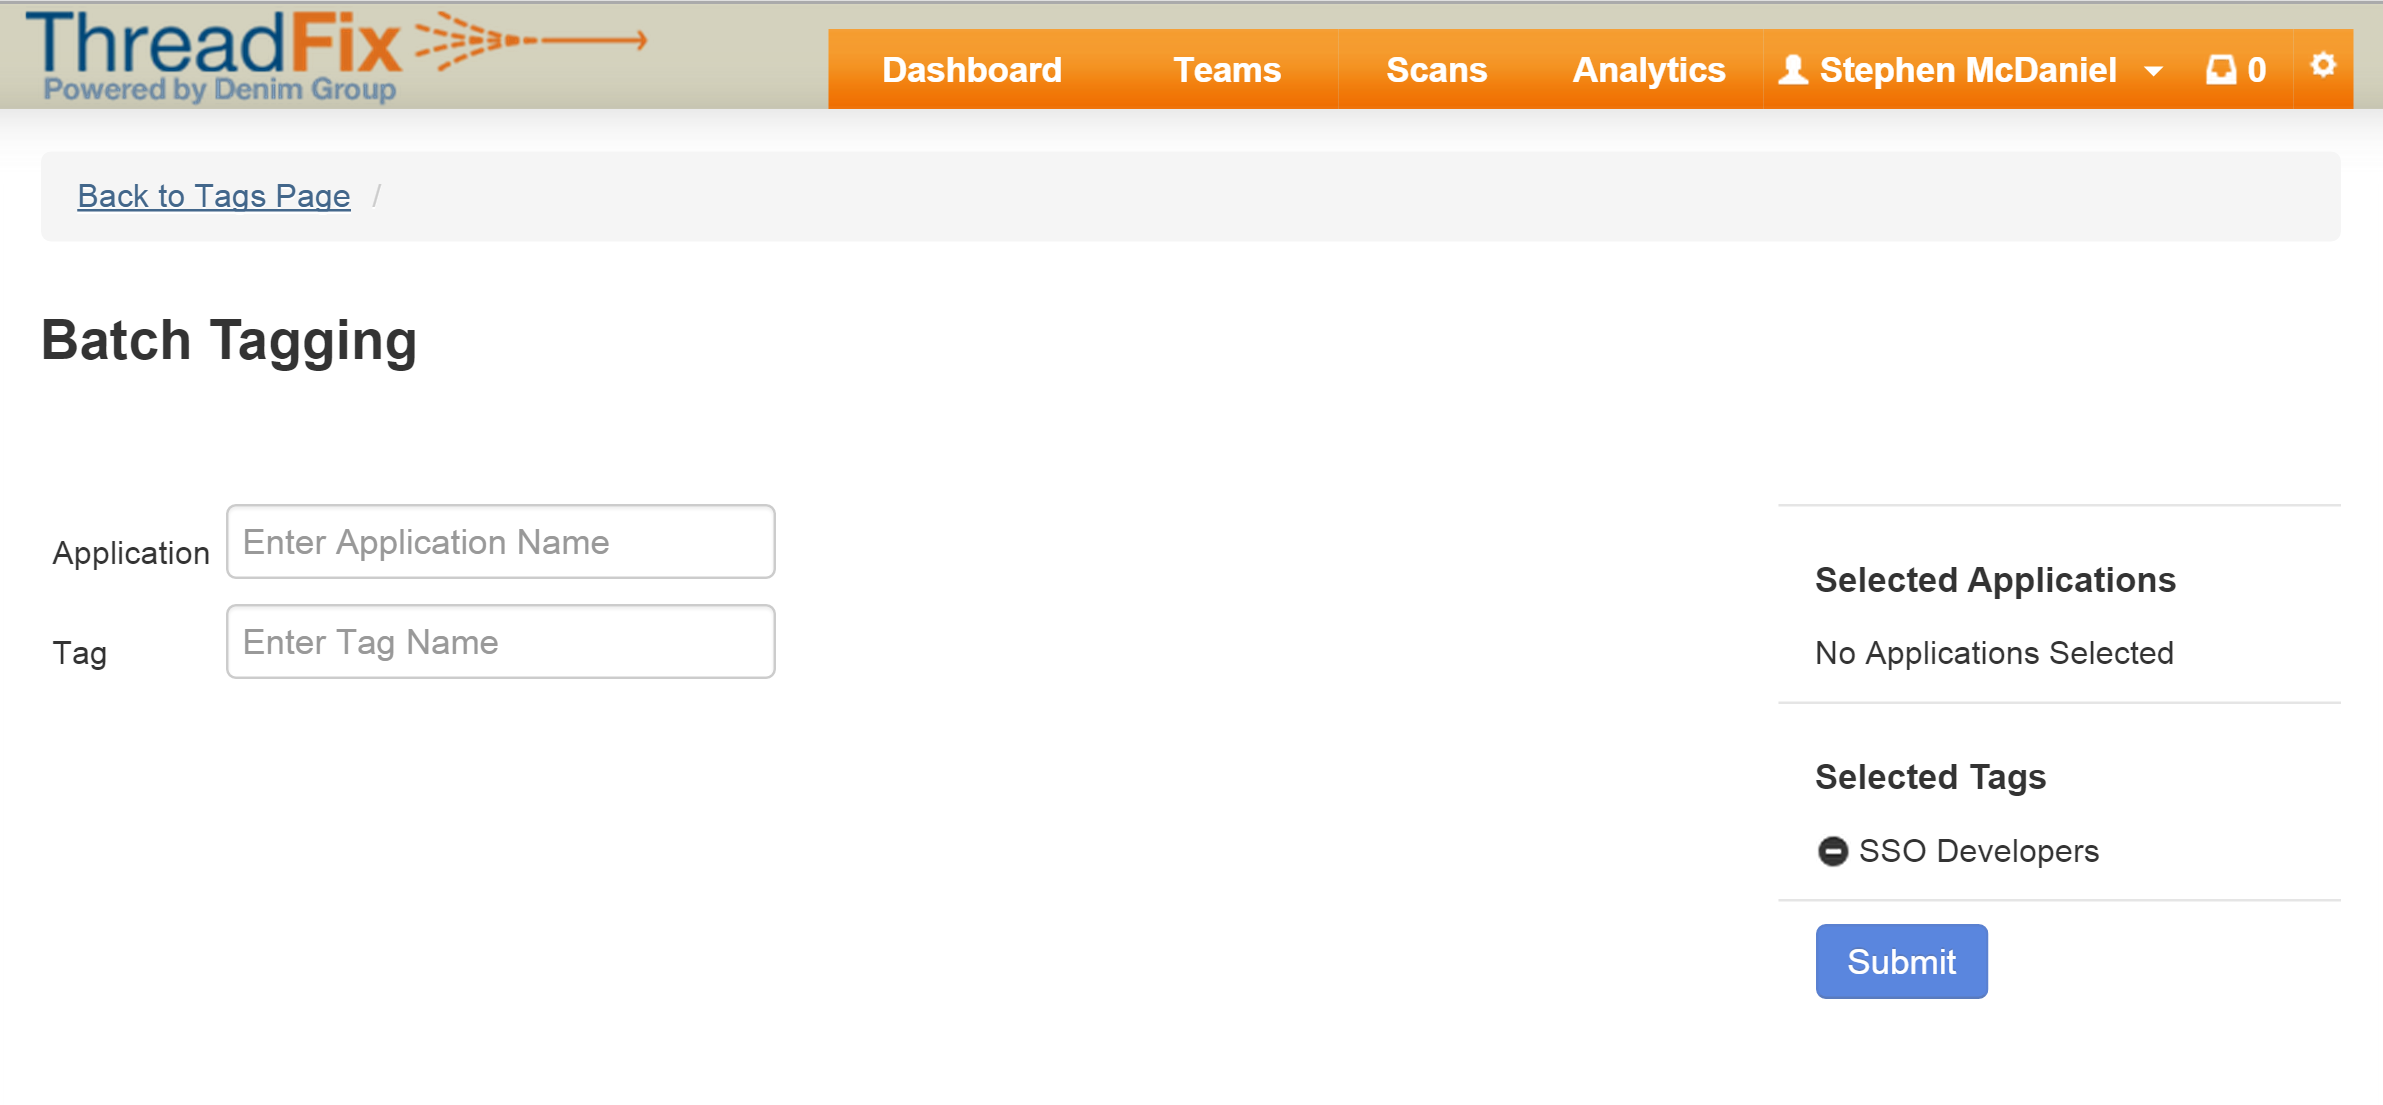
The new tag is displayed under selected tags. If you had chosen more than one tag, all of them would be displayed here. Now, start to type the name of your application or team in the Application text field. A dropdown appears listing your options.
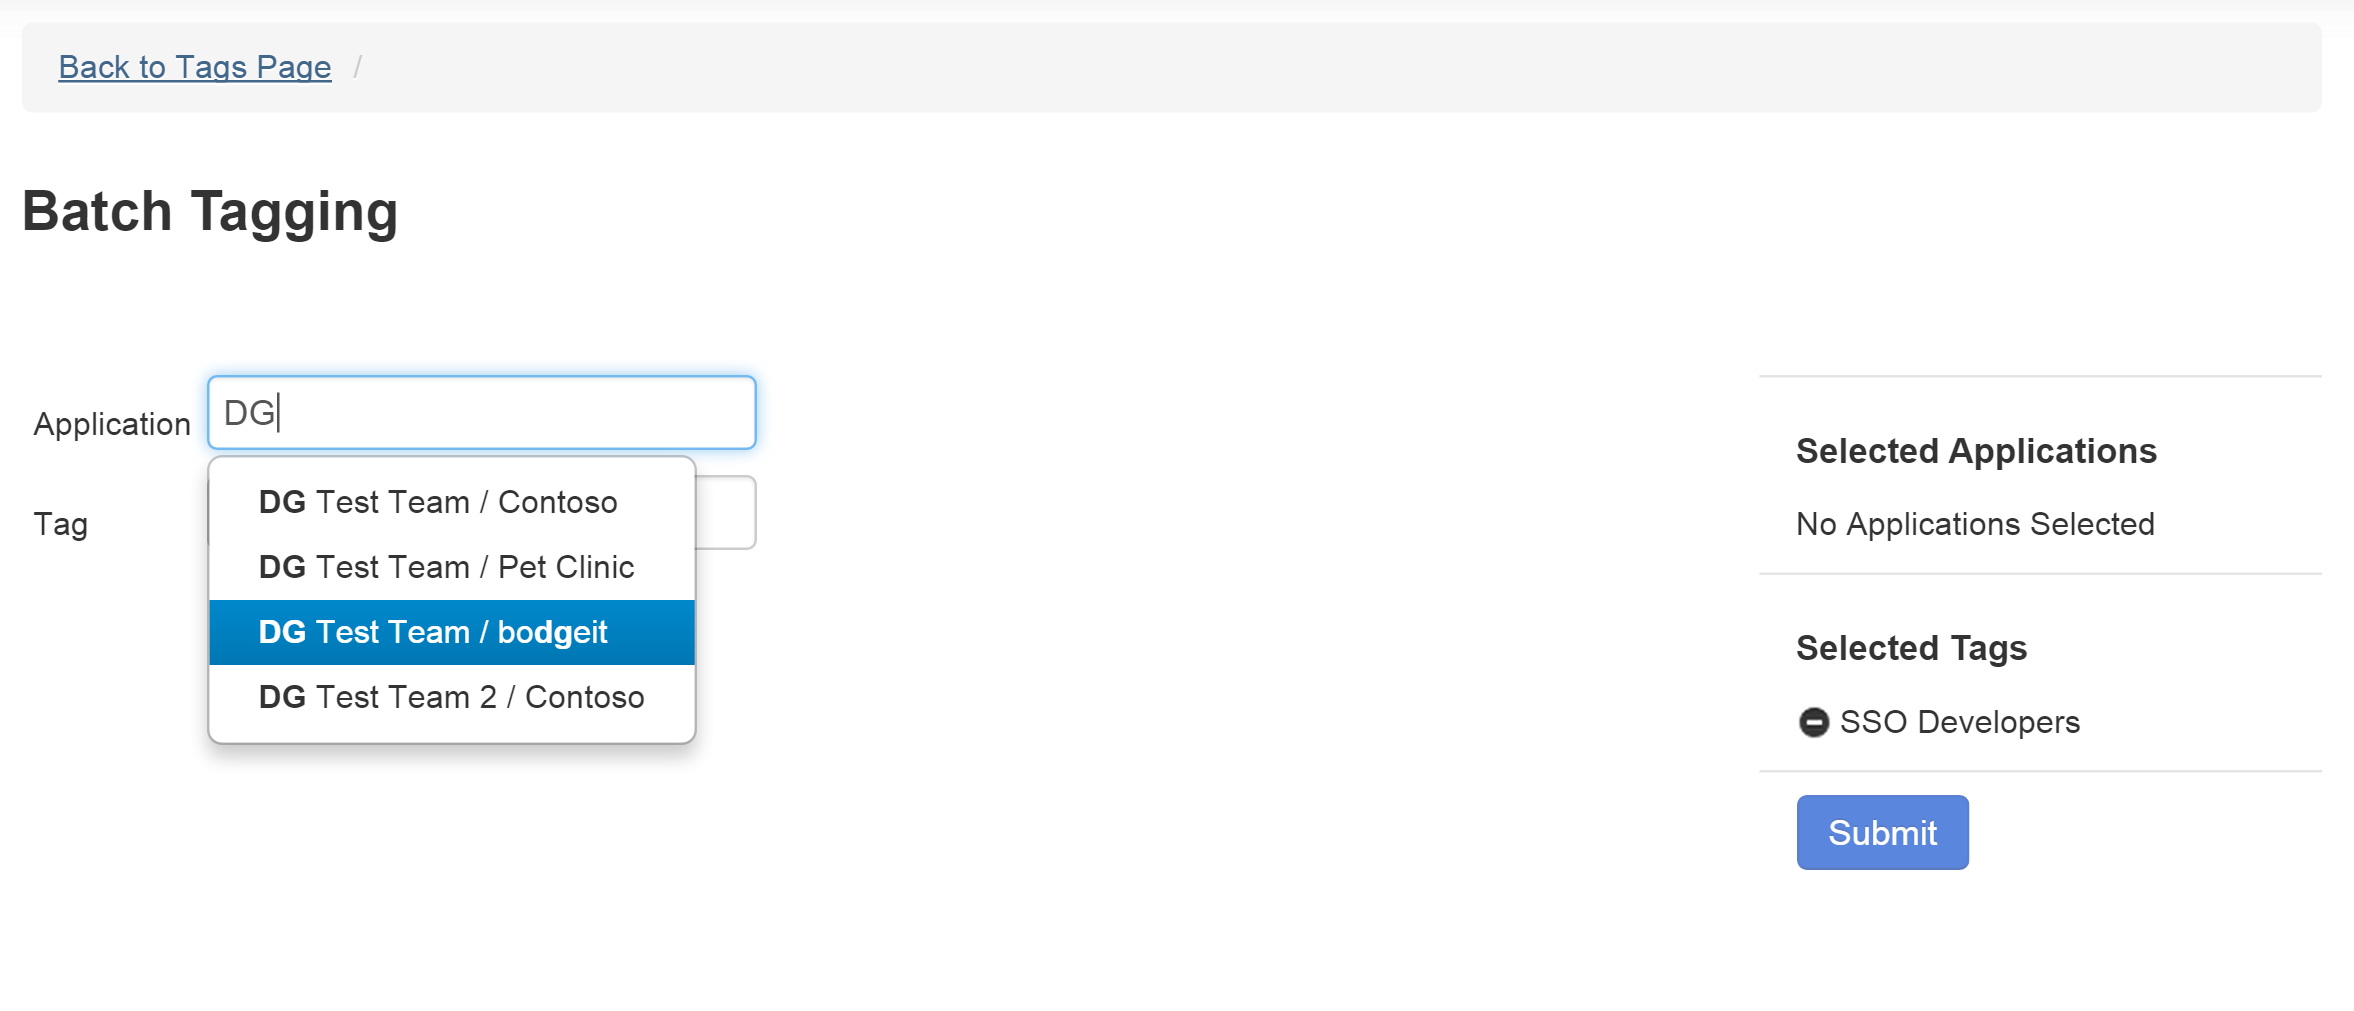
Select the application you wish to apply the tag to, and click the Submit button. You will see a success message that the batch tagging was successful.
Now, when you click on your new tag, the details page for that tag is displayed. This page lists the number and names of applications with this tag. It also lists the team associated with the application.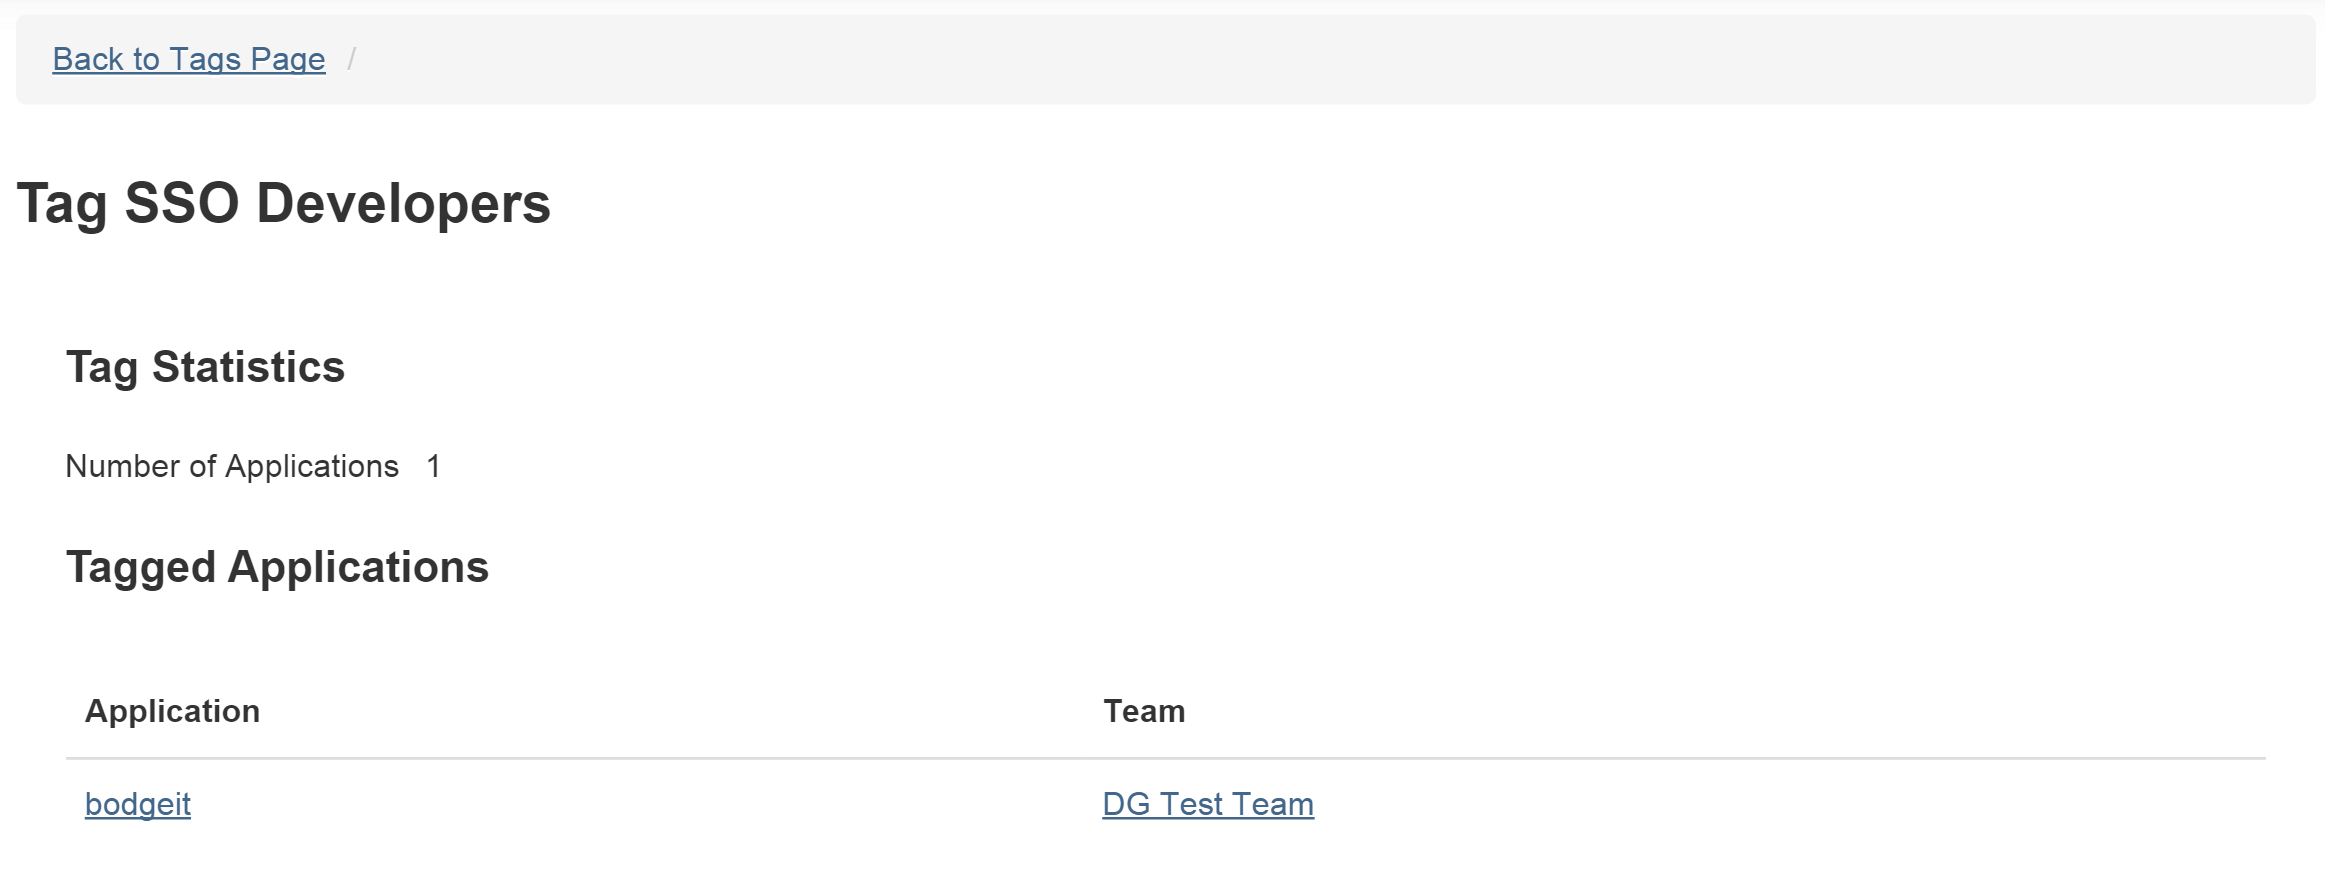
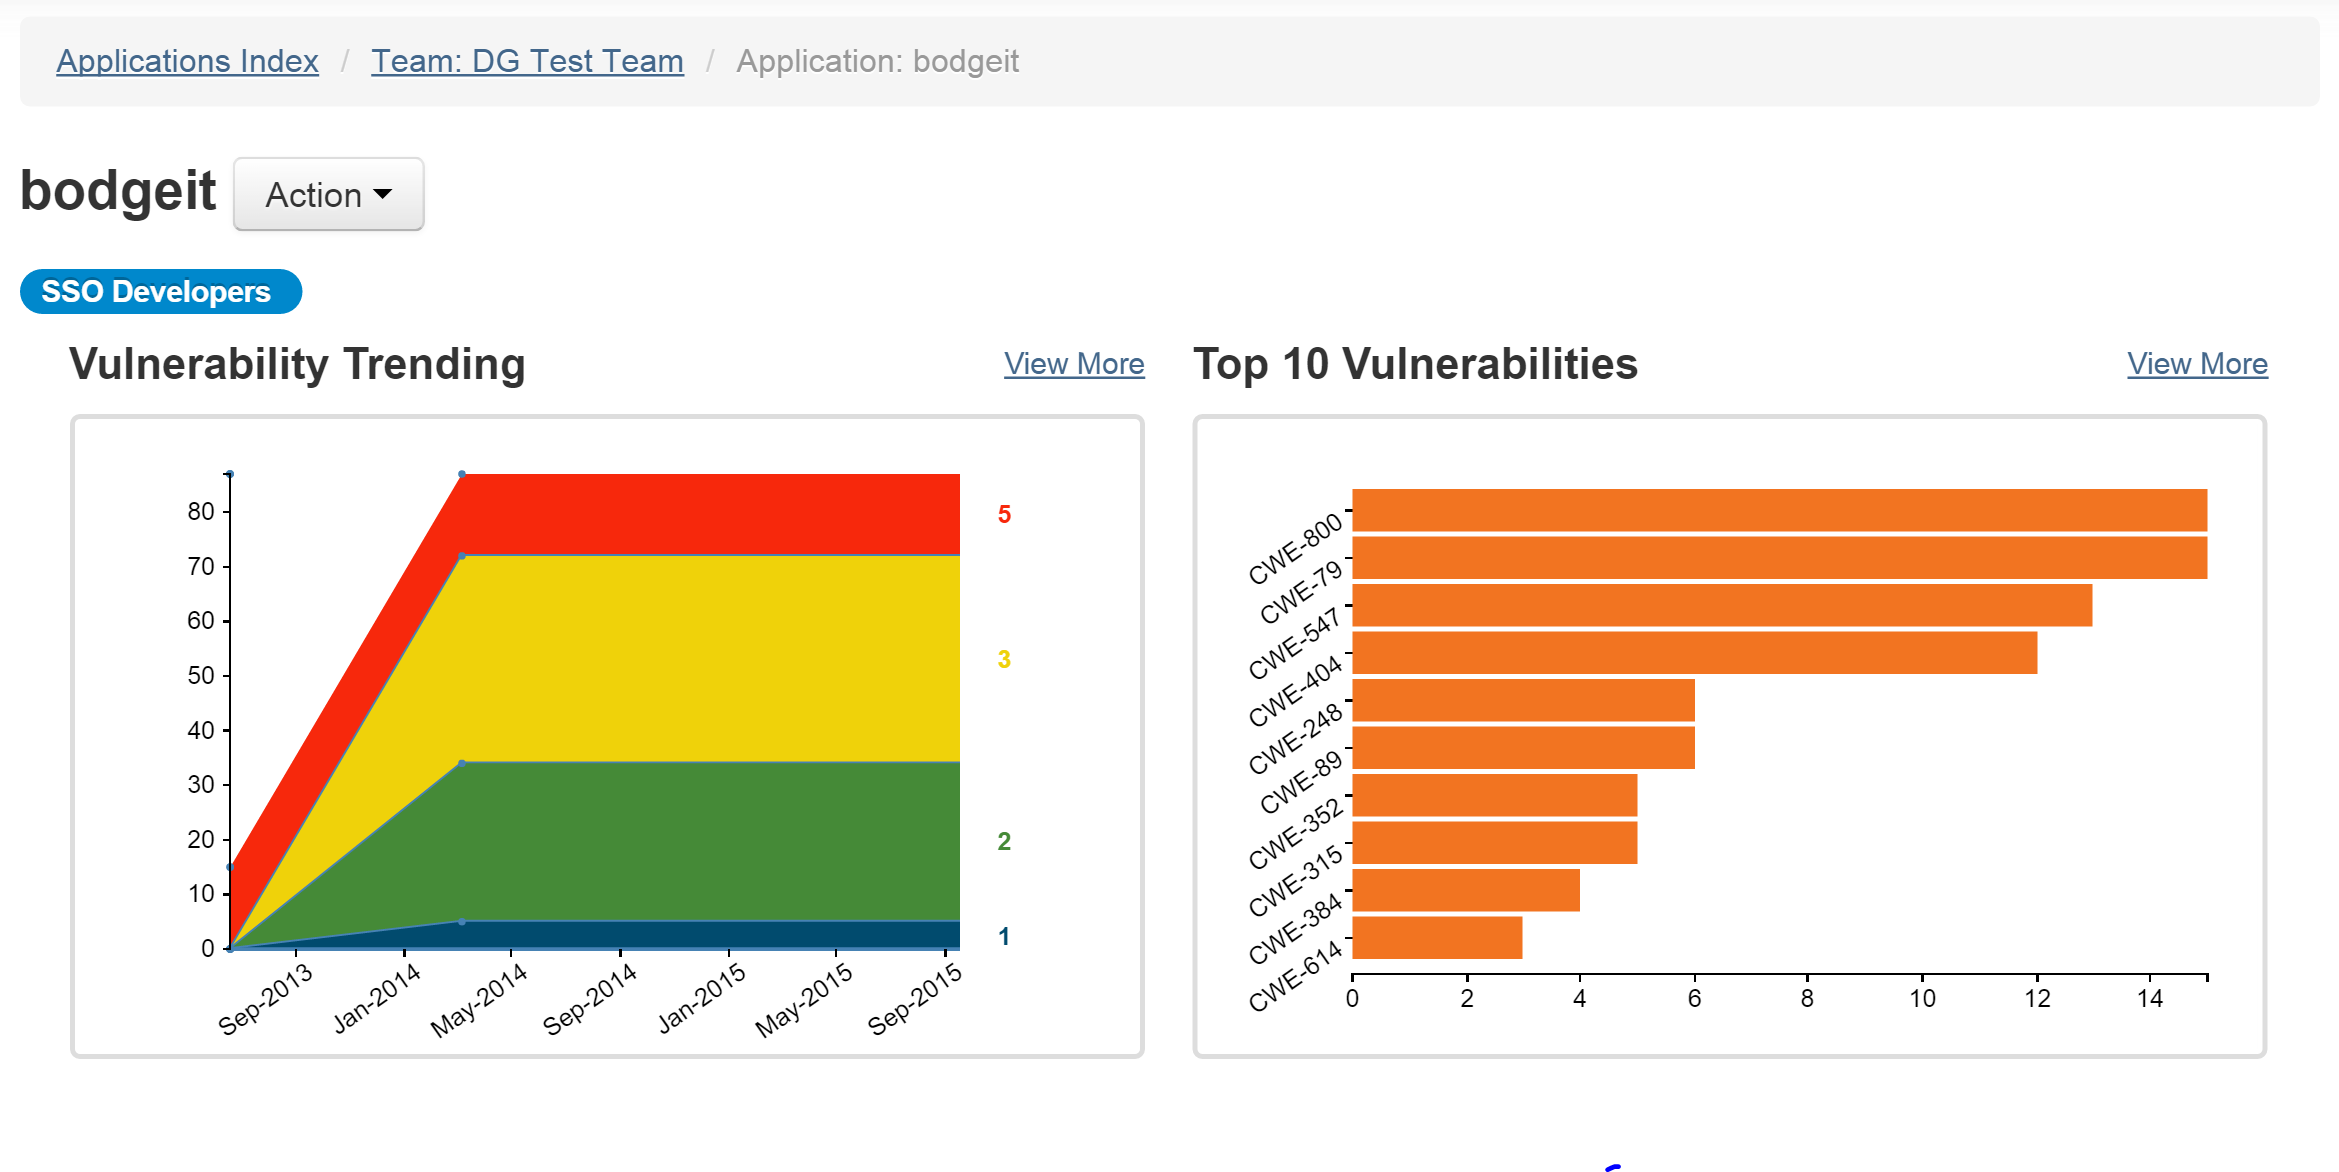
Click on the application name, and you are taken to the application details page, where the tag is now displayed beneath the application name:
Vulnerability Tags
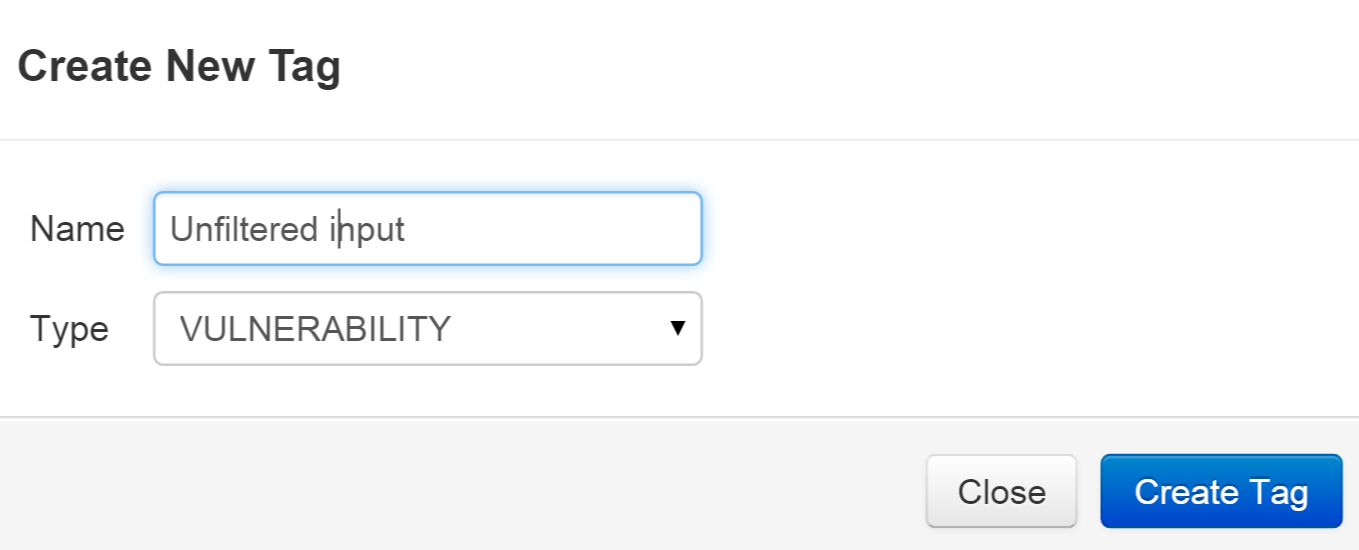
The process for creating a vulnerability tag is the same as for an application tag. Click the Create Tag button, name your vulnerability tag, and change the type to "VULNERABILITY". Click Create Tag inside the modal dialog, and your new vulnerability tag will be listed.

Attach a Vulnerability Tag to a Vulnerability
Now, we can attach our tag to a vulnerability. Go to the vulnerability tree view on your application’s detail page.
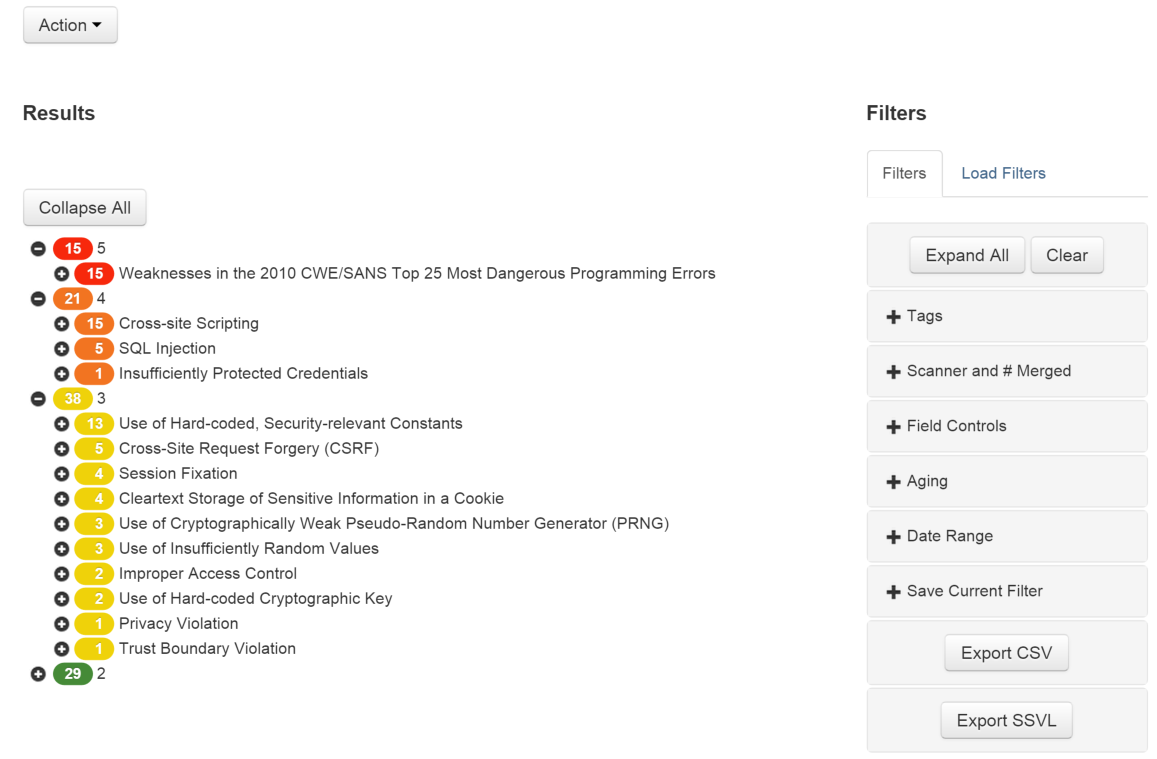
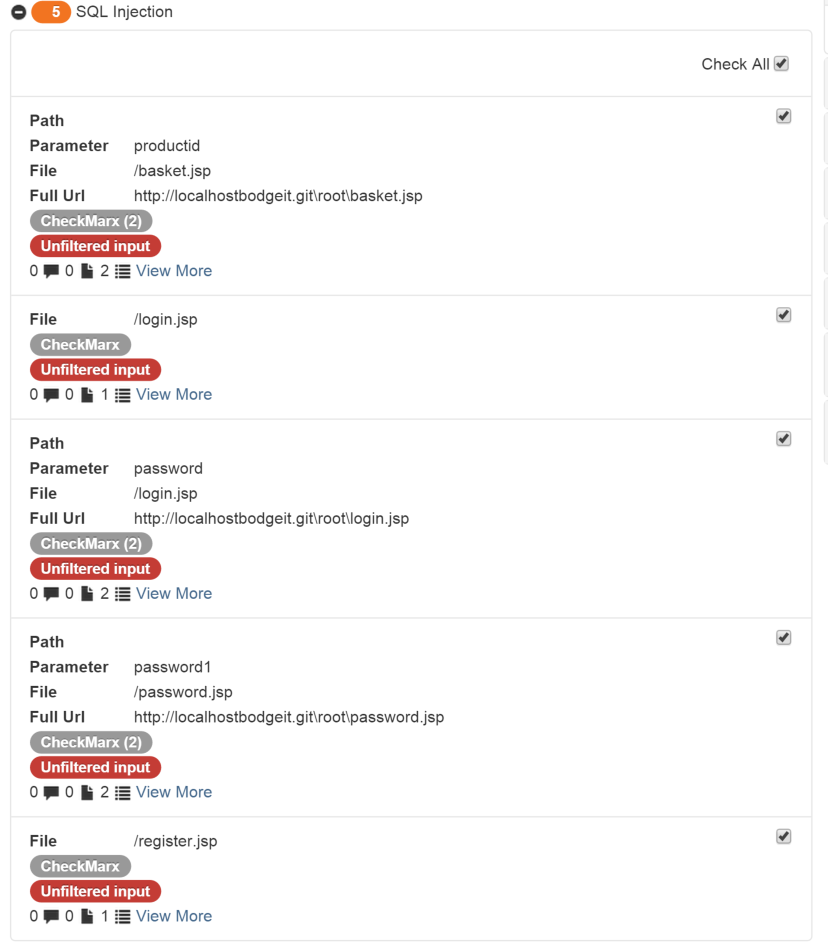
The tag we just created was called "Unfiltered inputs," so let’s open up the SQL Injection node. A list of SQL Injection vulnerabilities appears.
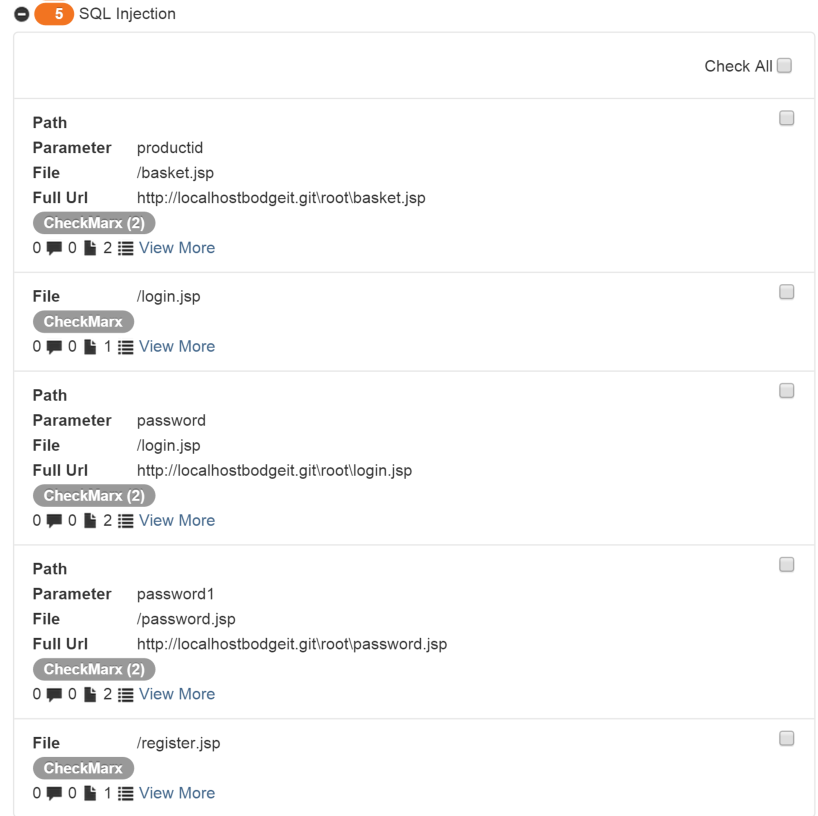
Select the Check All checkbox at the top of the vulnerability list and click on the Action dropdown. Select Batch Tagging.
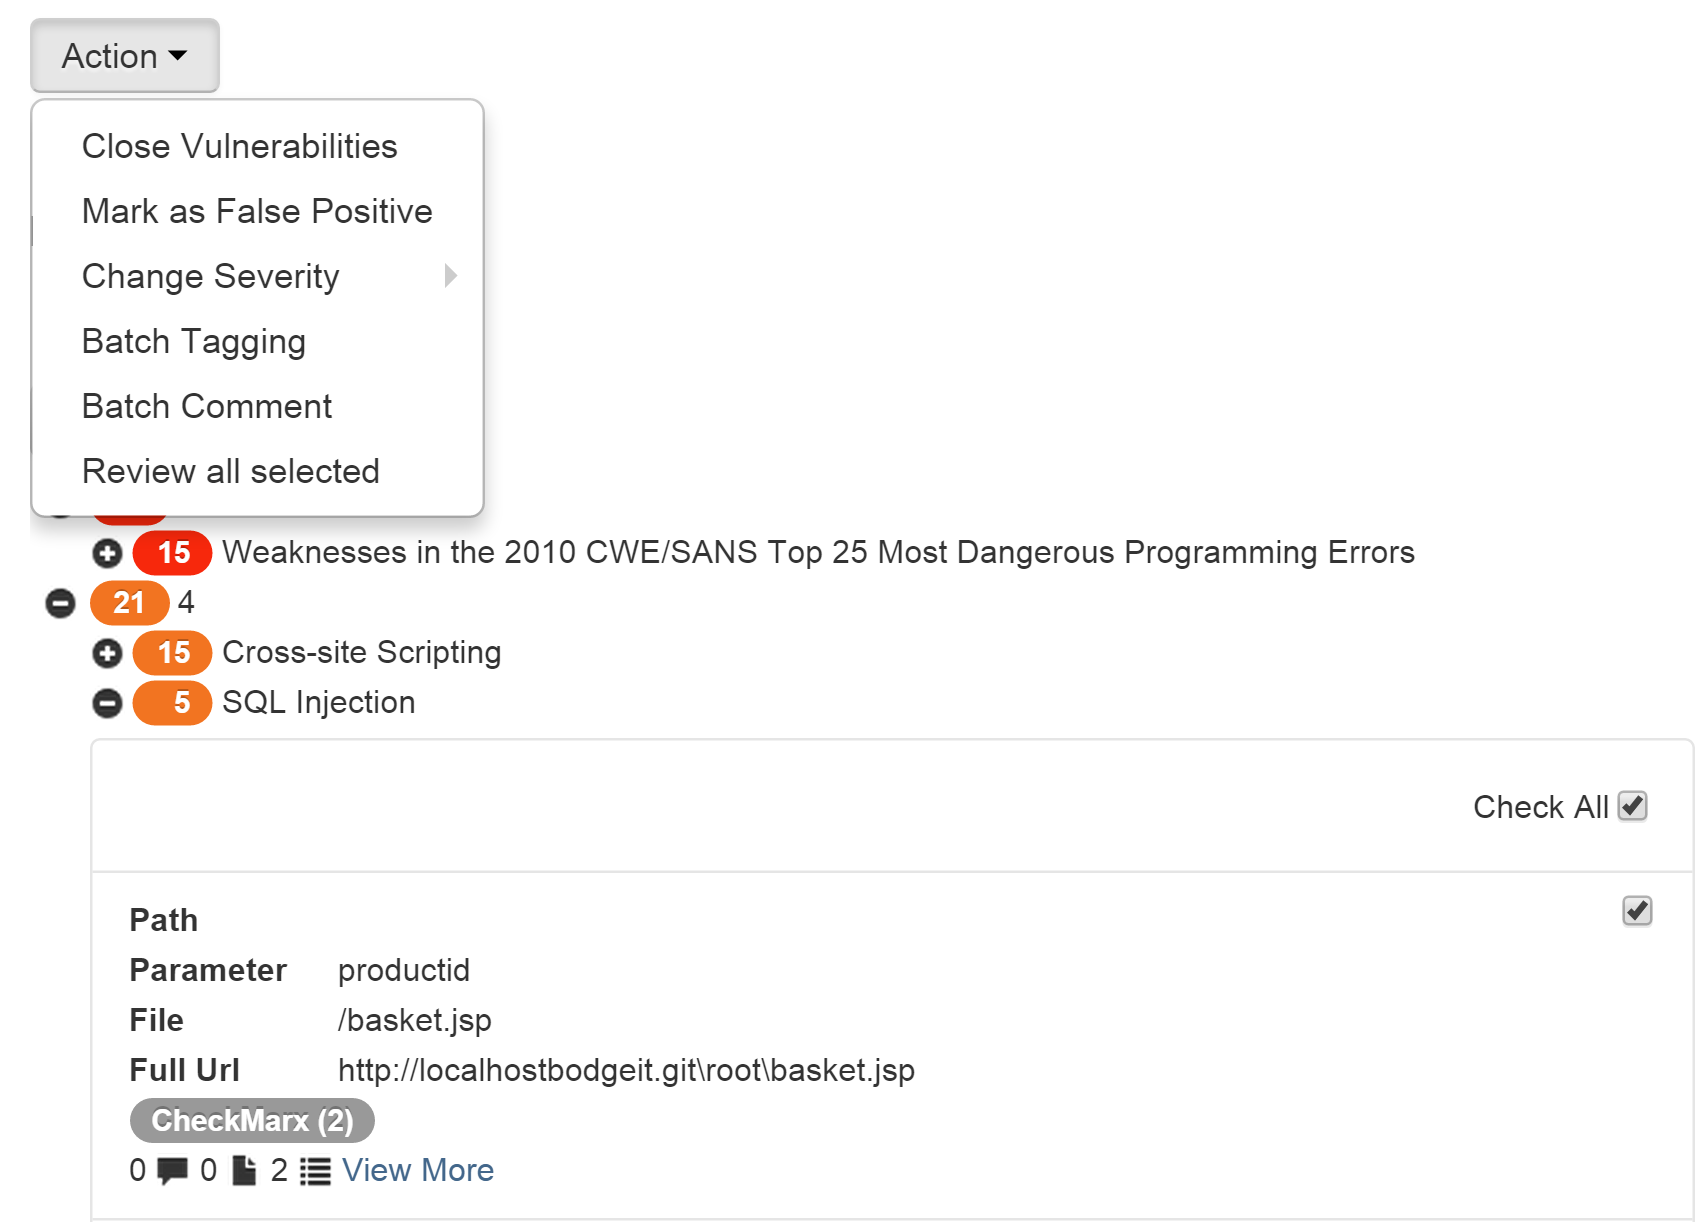
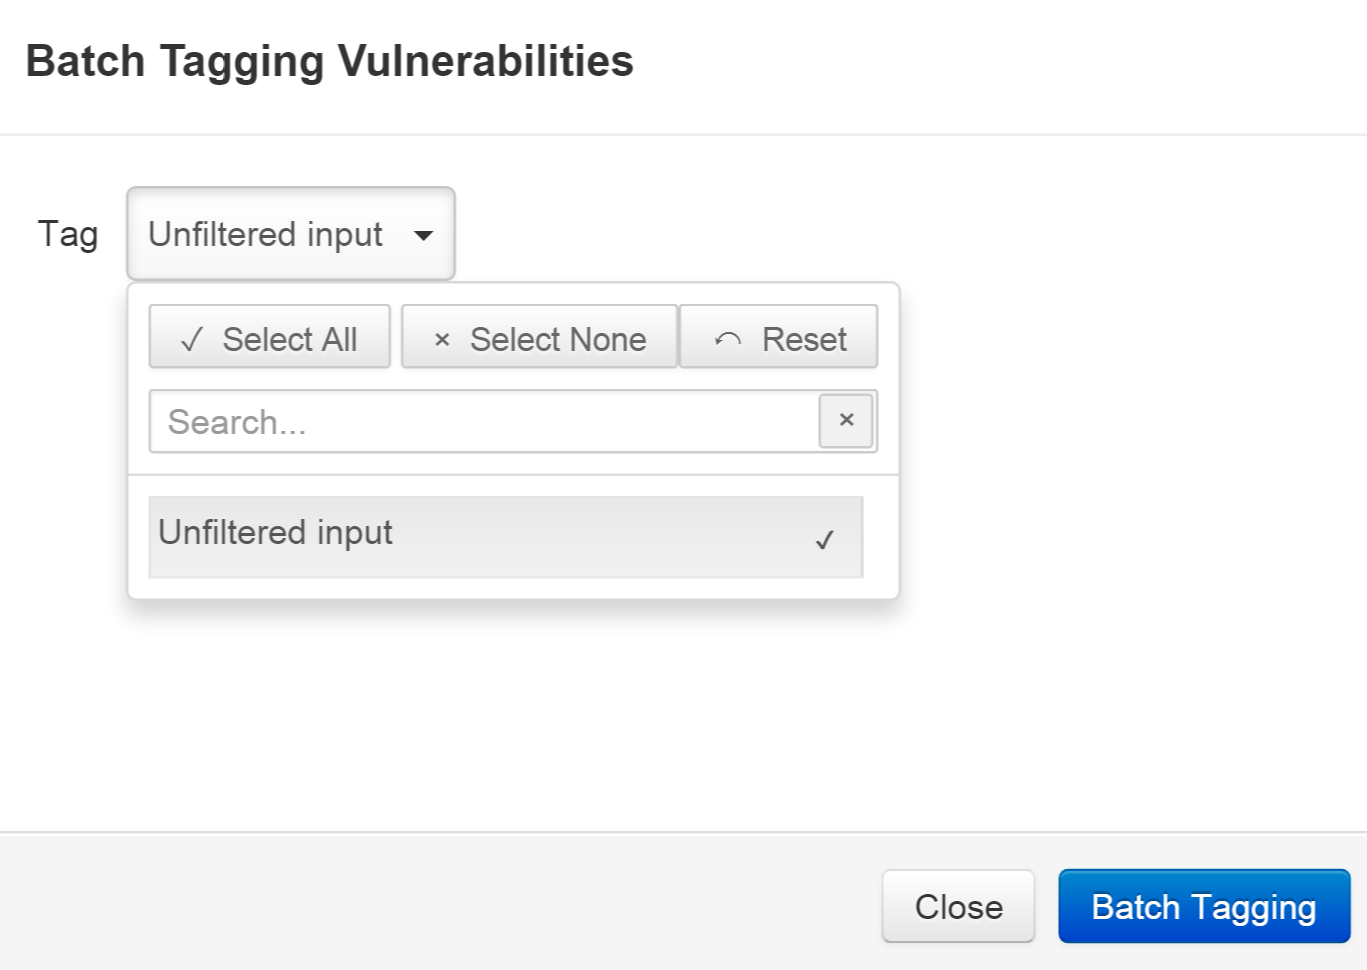
Select the tag you just created, and click Batch Tagging.
You will see that each of the selected vulnerabilities has been tagged, like so:
Return to your application detail page. Now, we are interested in the Filters column on the right. Click and expand the Tags filter field, then Vulnerability.
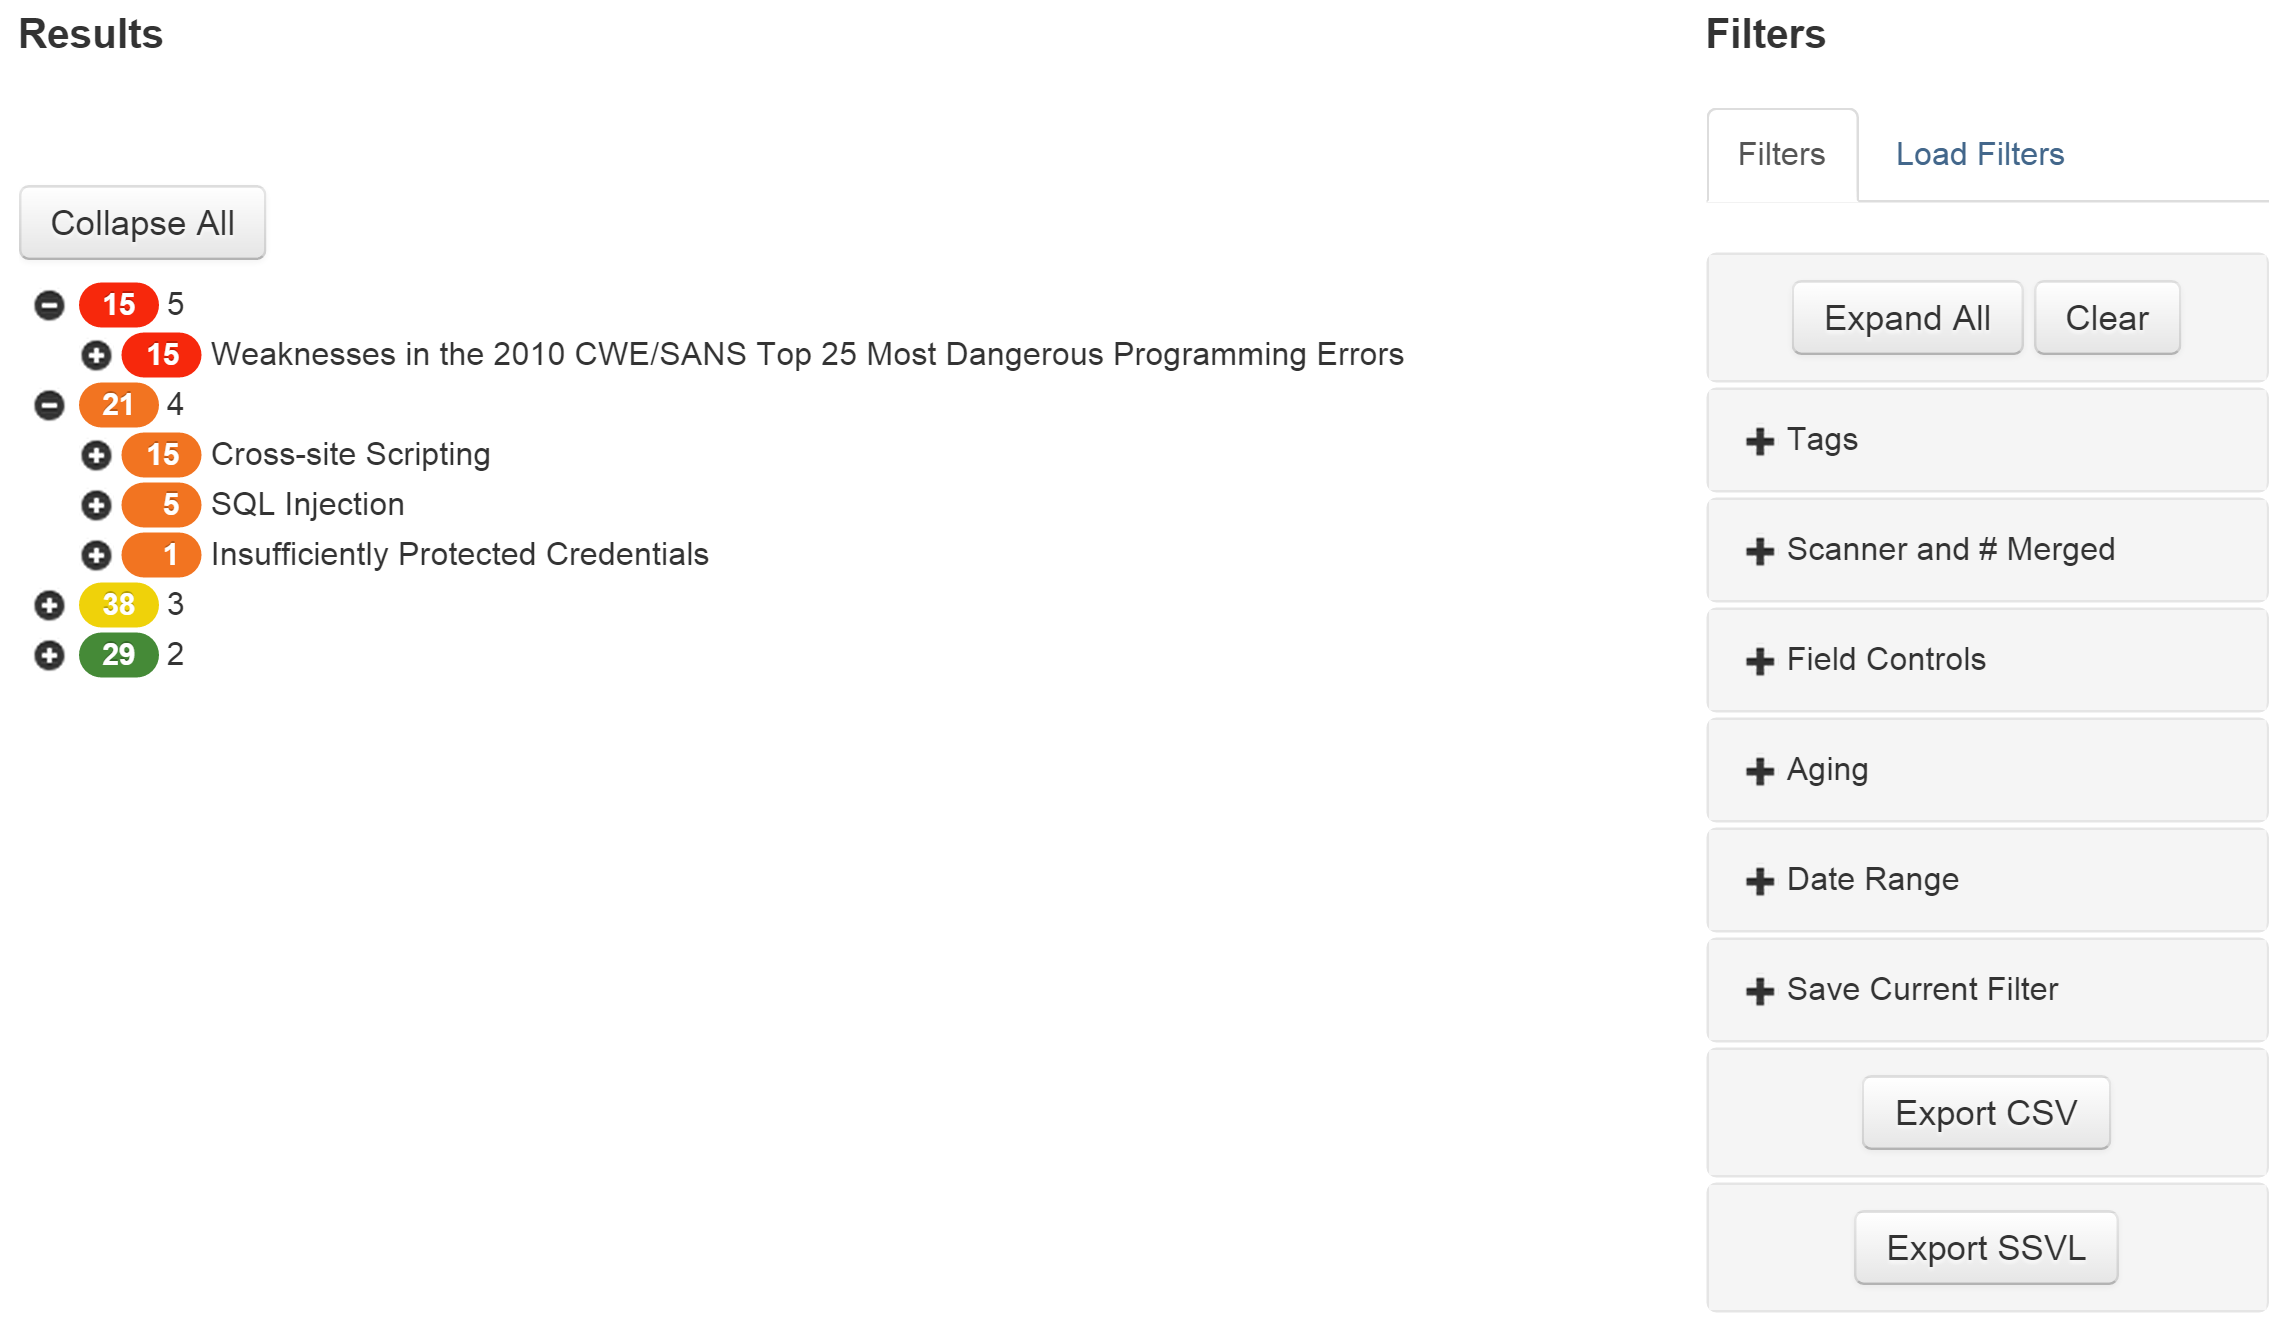
Type in the name of your vulnerability tag in the text field. If you have a number of tags, all possibilities will be listed, based upon the text you input. When you have chosen your tag, hit the enter key.
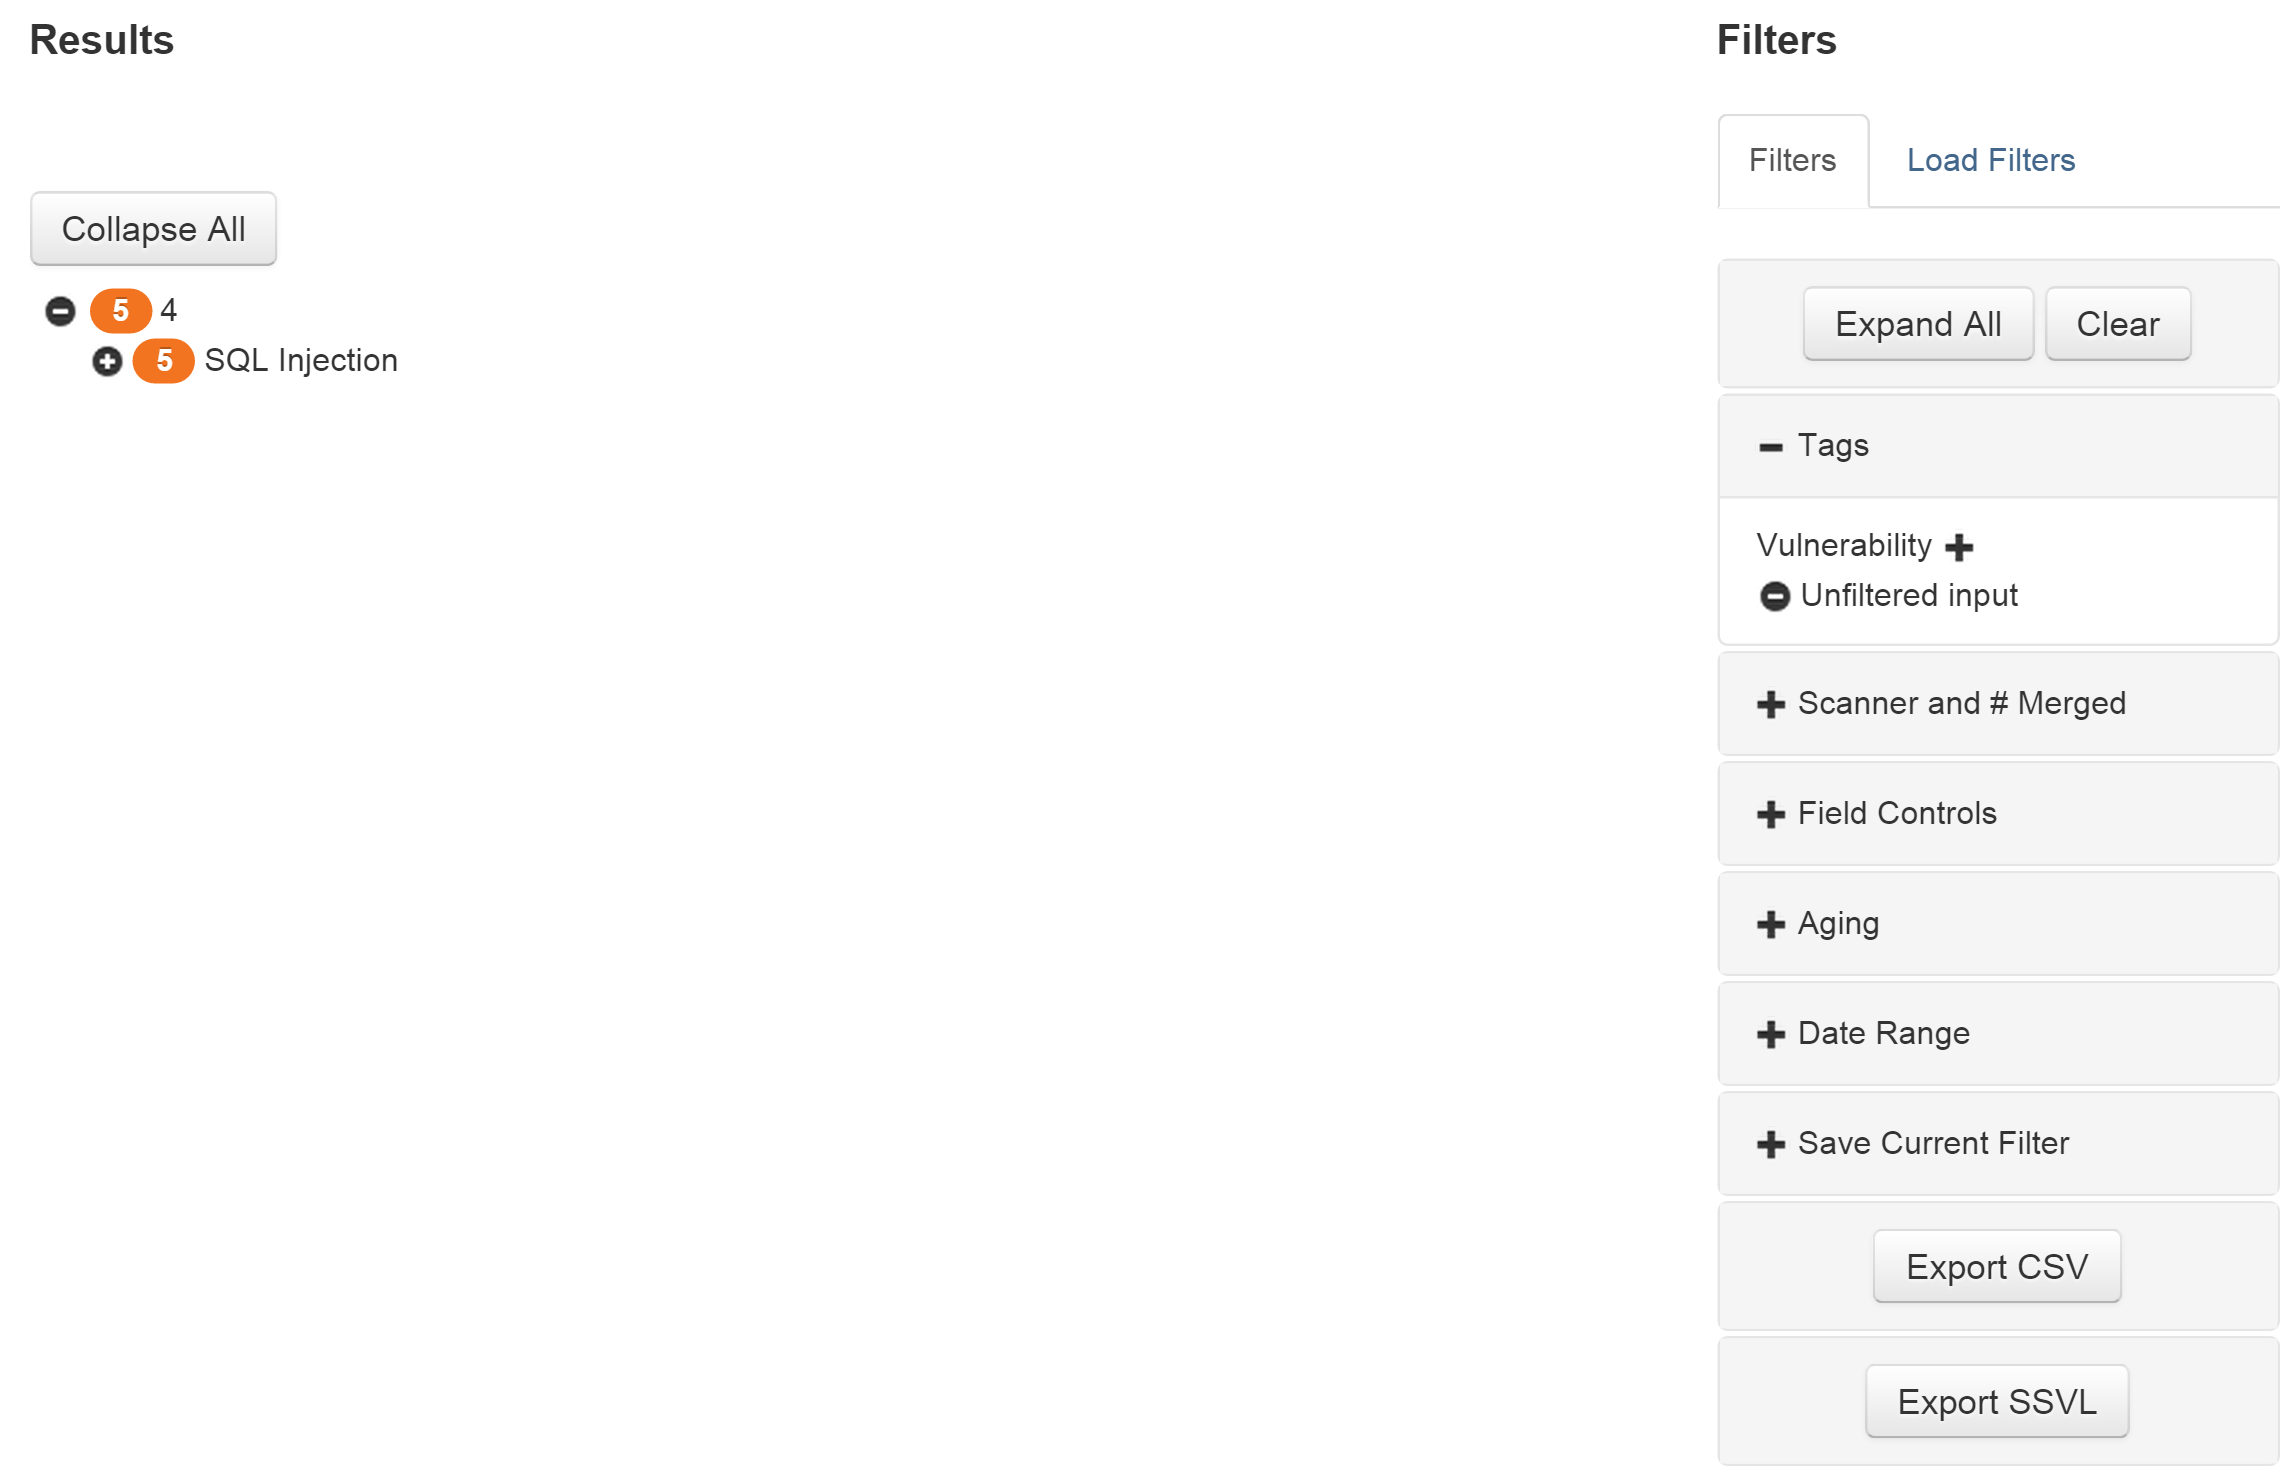
As you can see, the tree view has filtered out all vulnerabilities except the entries tagged with "Unfiltered input."
...
| Child pages (Children Display) | ||
|---|---|---|
|