📙 You will learn
How to generate a Burp Suite report and upload it to ThreadFix.
Prerequisites
Audience: IT Professional
Difficulty: Basic
Time needed: Approximately 10 minutes
Tools required: N/A
Generate Results
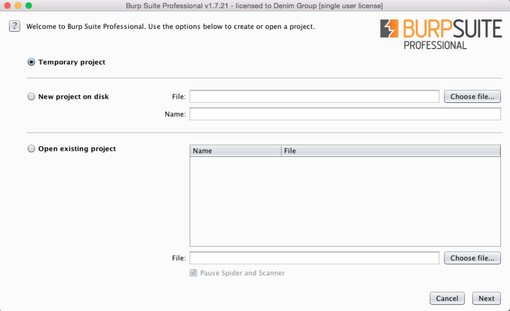
After launching BURP Suite Professional, there are three options for obtaining results to generate a report. Select any of the available options below:
Temporary project
New project on disk
Open existing project
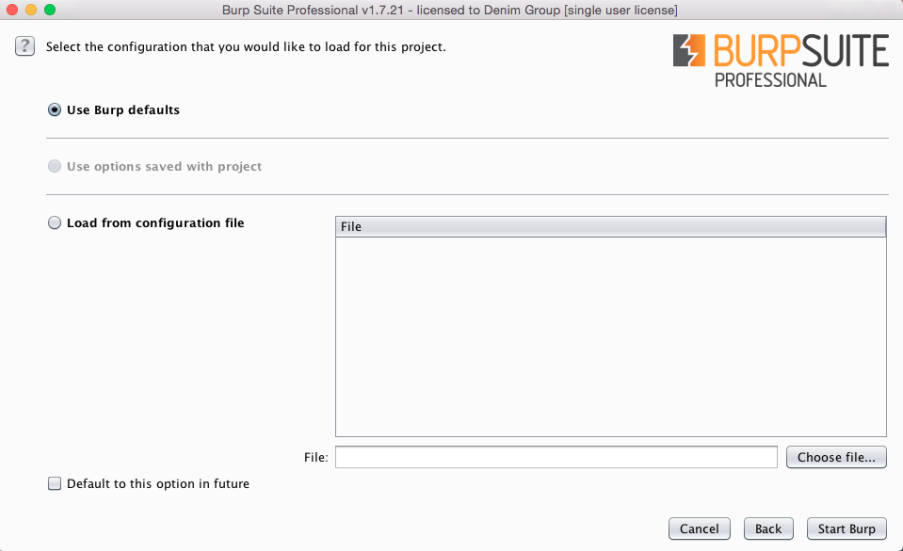
Select Use Burp defaults and select Start Burp:
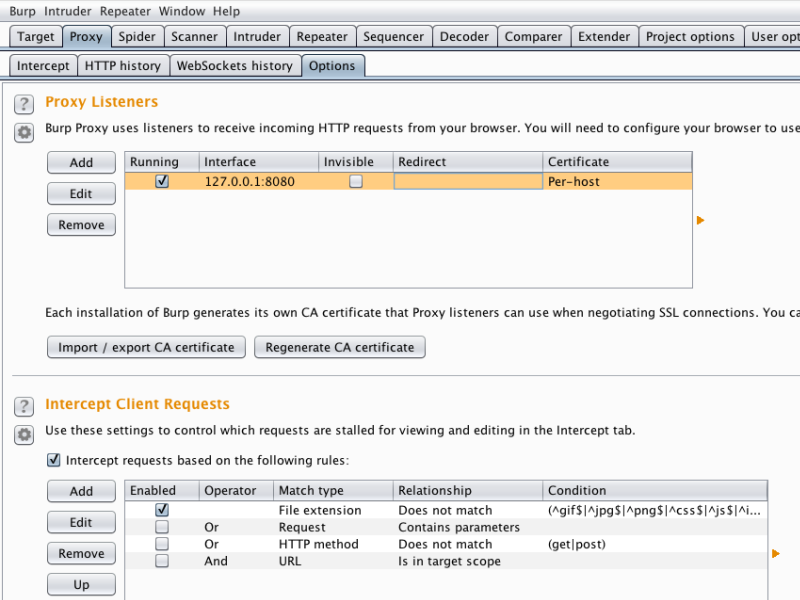
Select the Proxy tab and select the Options tab. Make sure the Proxy is running:
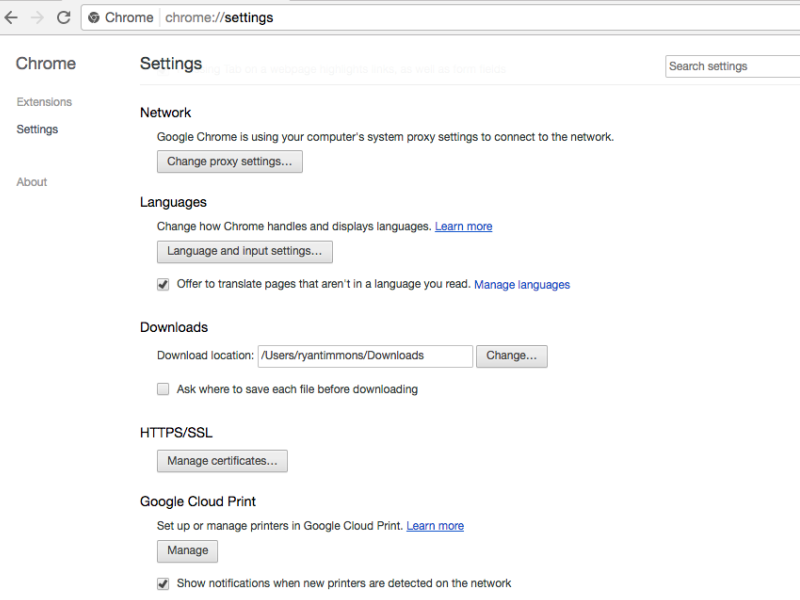
Open Chrome and set the proxy through the settings tab. Set the port to the one used in BURP:
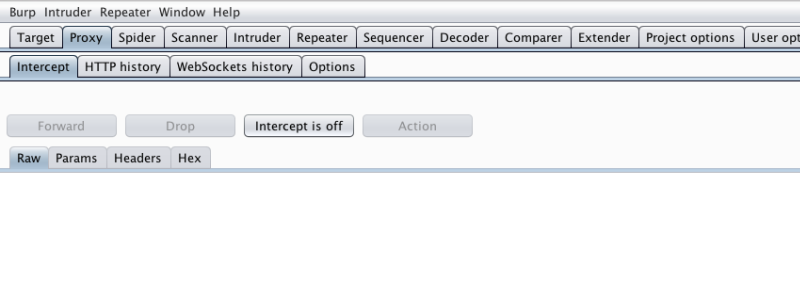
Select Intercept tab and set turn the Interceptor off:
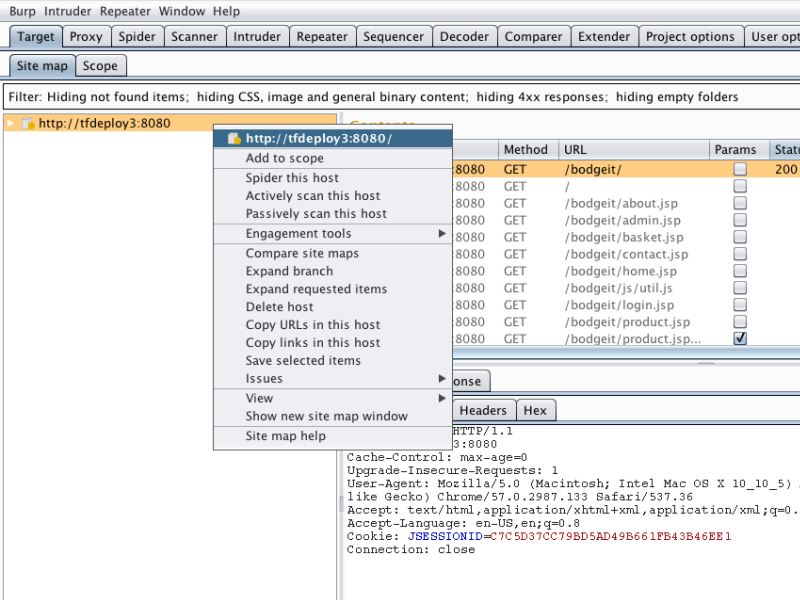
Navigate to the Target in Chrome, select the Target tab and then select the URL in Burp:
Run the Spider
Run the Actively scan this host
Run the Passively scan this host
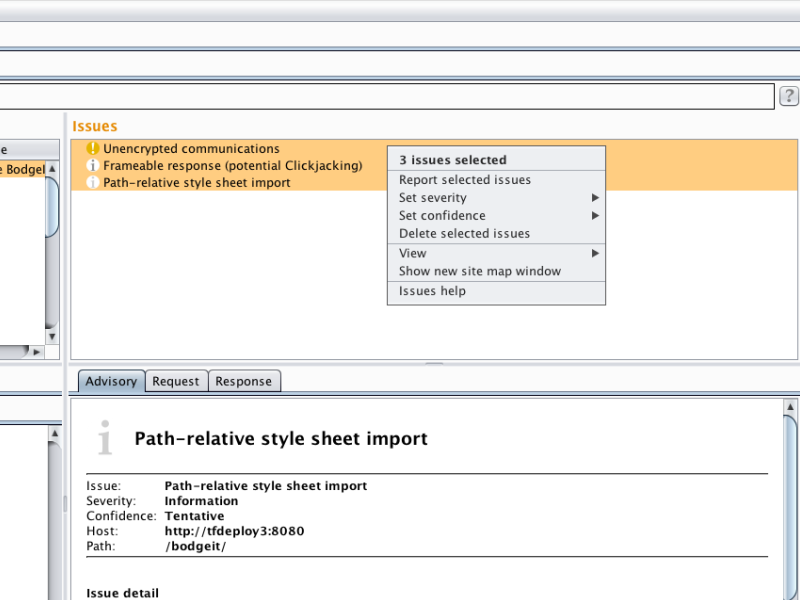
Select the findings in the Issues Pane and select Report selected issues:
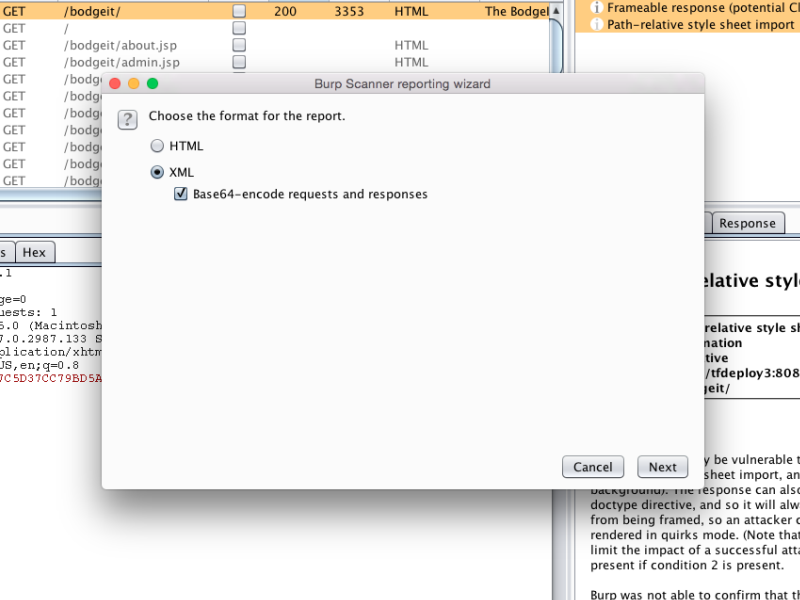
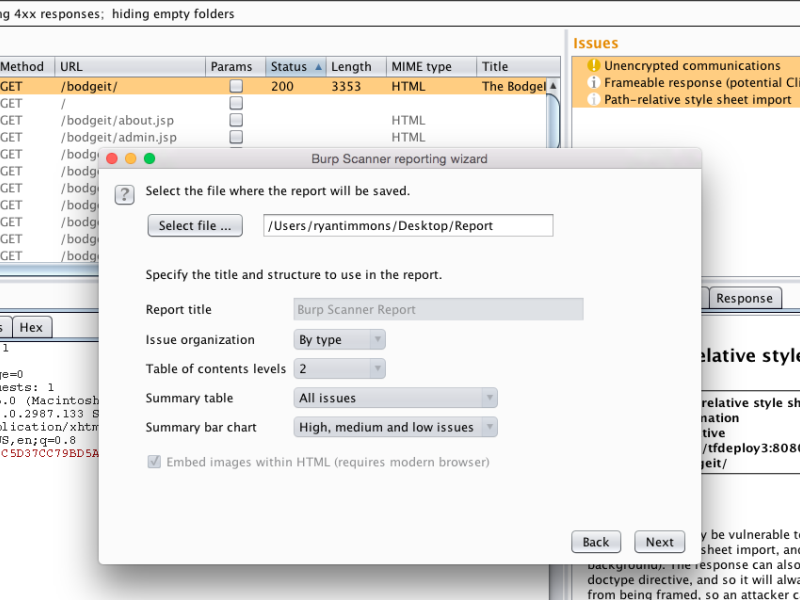
Select XML for the report format and check the Base64 box below it:
Select Next until the wizards asks to save the file and save it to the desired directory:
Upload Results
After generating the report, log in to ThreadFix and navigate to the Teams tabthe Teams view, within the Portfolio page. Expand the Team that the report will be uploaded to:.
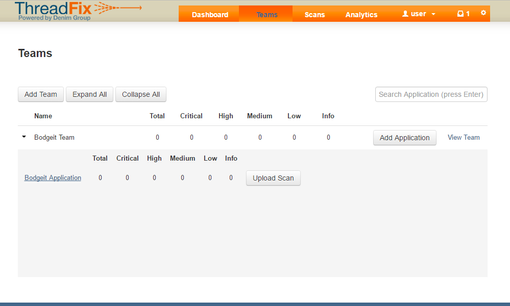
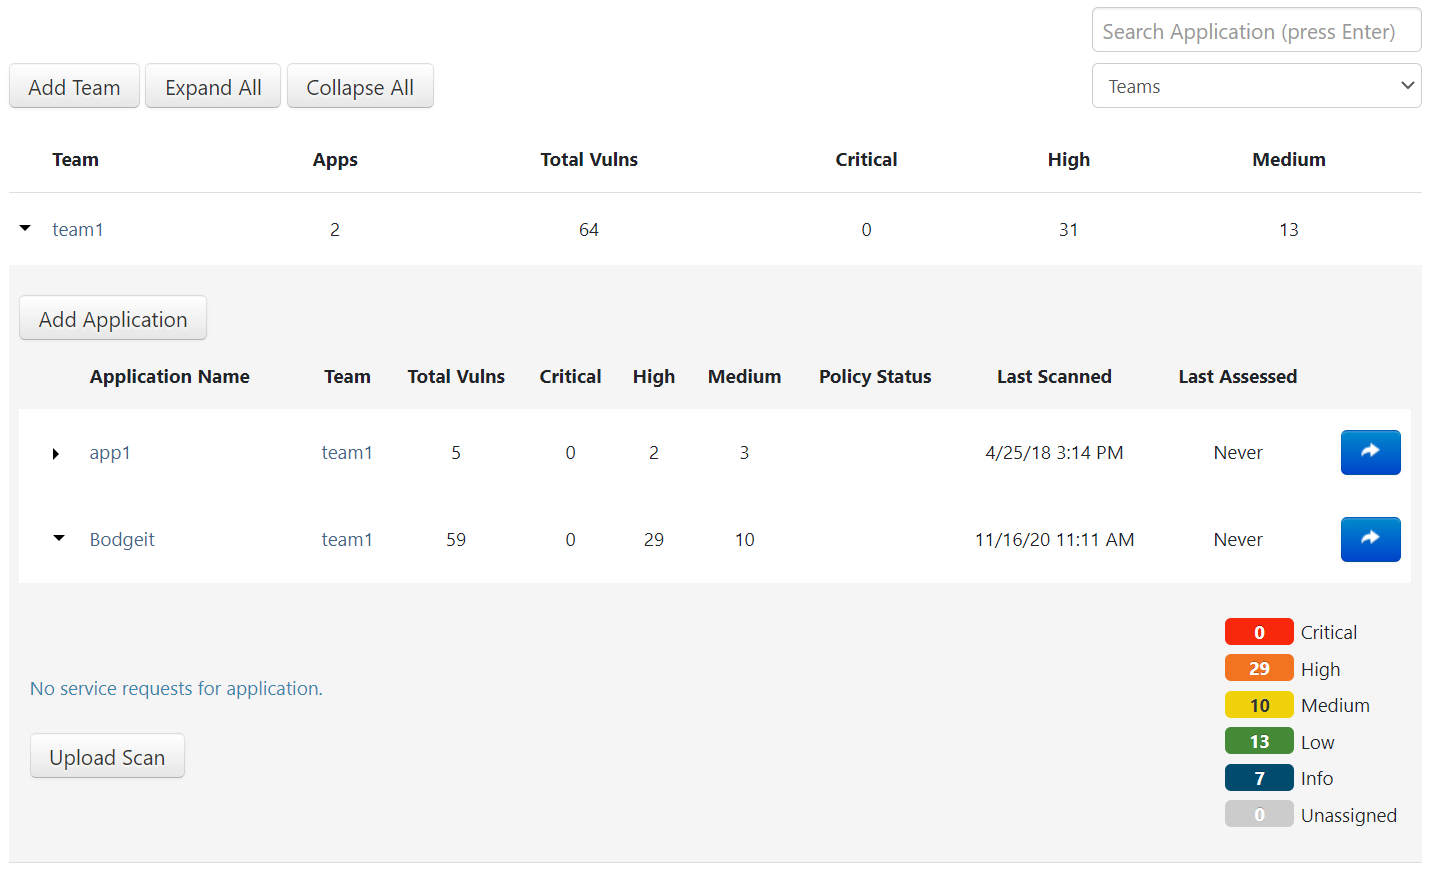
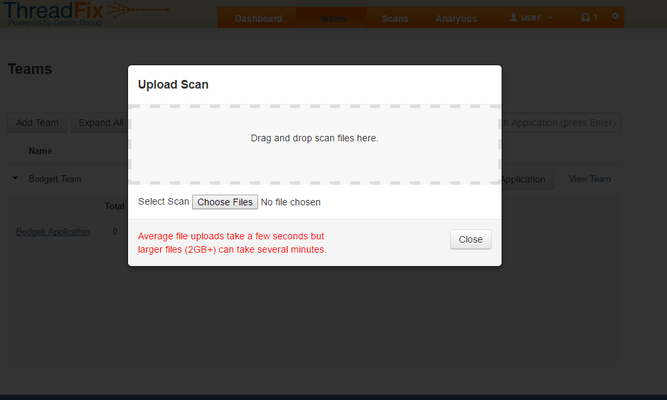
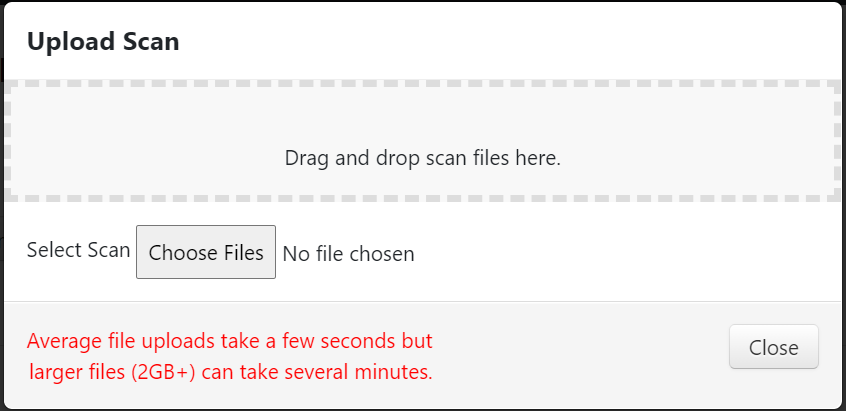
After picking one of the Team's Application, select Upload Scan and drag the report into the Pane:
Once ThreadFix has finish processing the report, the results can be viewed on the Application's pageview:

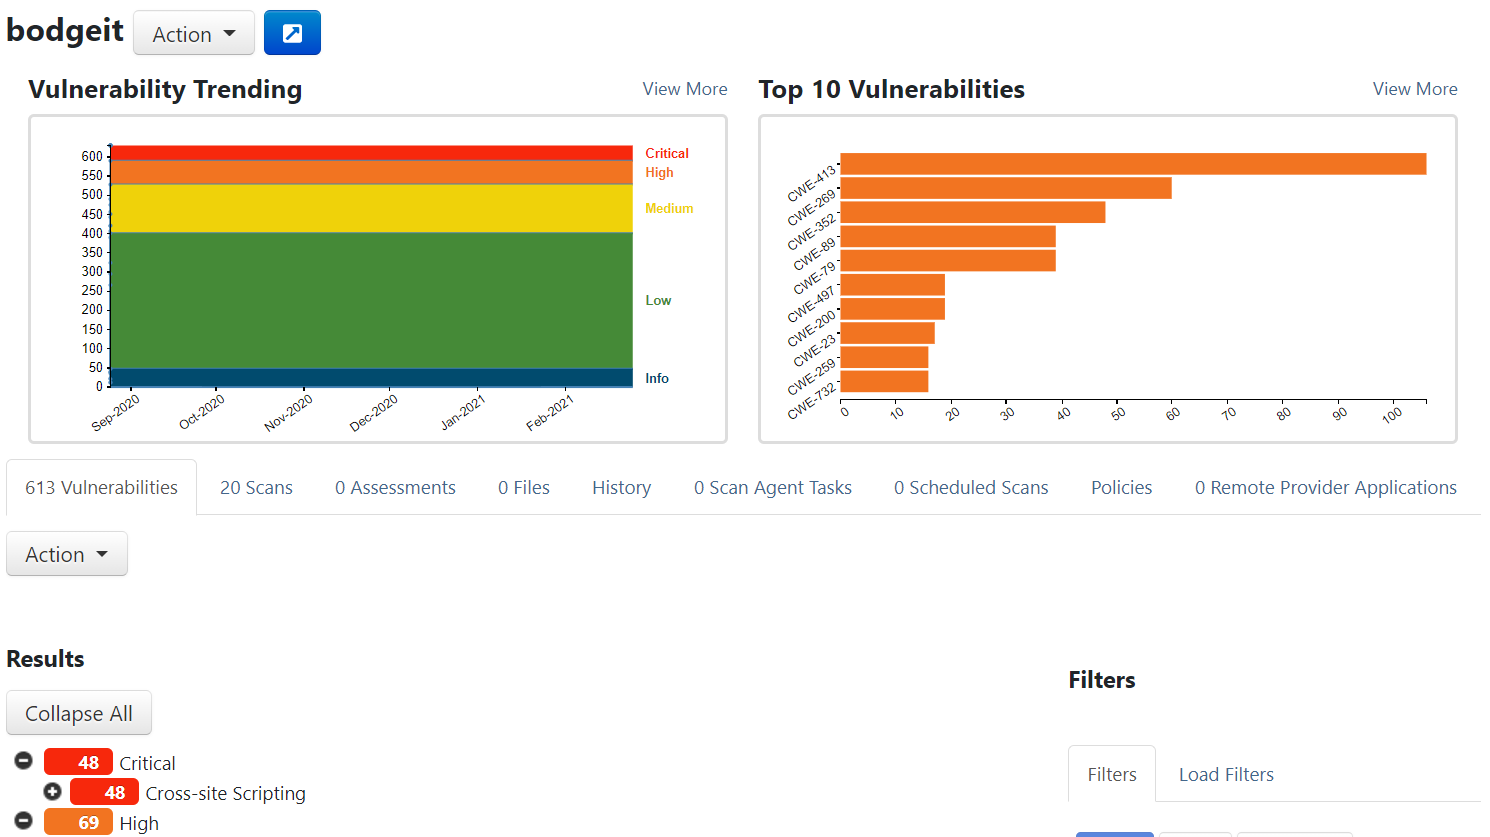
Table of Contents
| Table of Contents |
|---|