📙 You will learn
How to map, configure, and customize scanner vulnerabilities.
Prerequisites
Audience: IT Professional or End User
Difficulty: Basic
Time needed: Approximately 10 minutes
Tools required: N/A
Users can configure severities for any scanner vulnerability type. For , for instance, the user could users can create a mapping that "All Fortify XSS vulnerabilities are Criticals, but AppScan XSS is only Medium."As of version 2.7.4, you can deny list or allow list scanner vulnerabilities, allowing you to filter the types of vulnerabilities that you want ThreadFix to ingest.
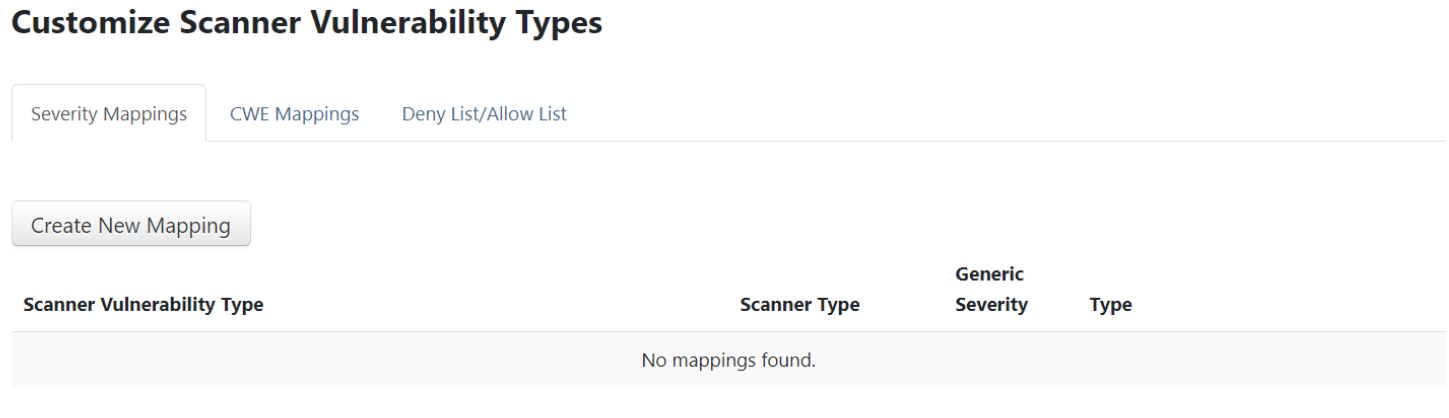
Severity Mappings
Severity Mappings for different scanner vulnerability types allow the ThreadFix administrator to customize their installation by remapping the severity of scanner vulnerabilities. First, click the
First click on the Application menu from the Navigation sidebar and click on the Customize submenu. Click on Scanner Vulnerability Types and from the Severity Mappings tab click on the Create New Mapping
button.

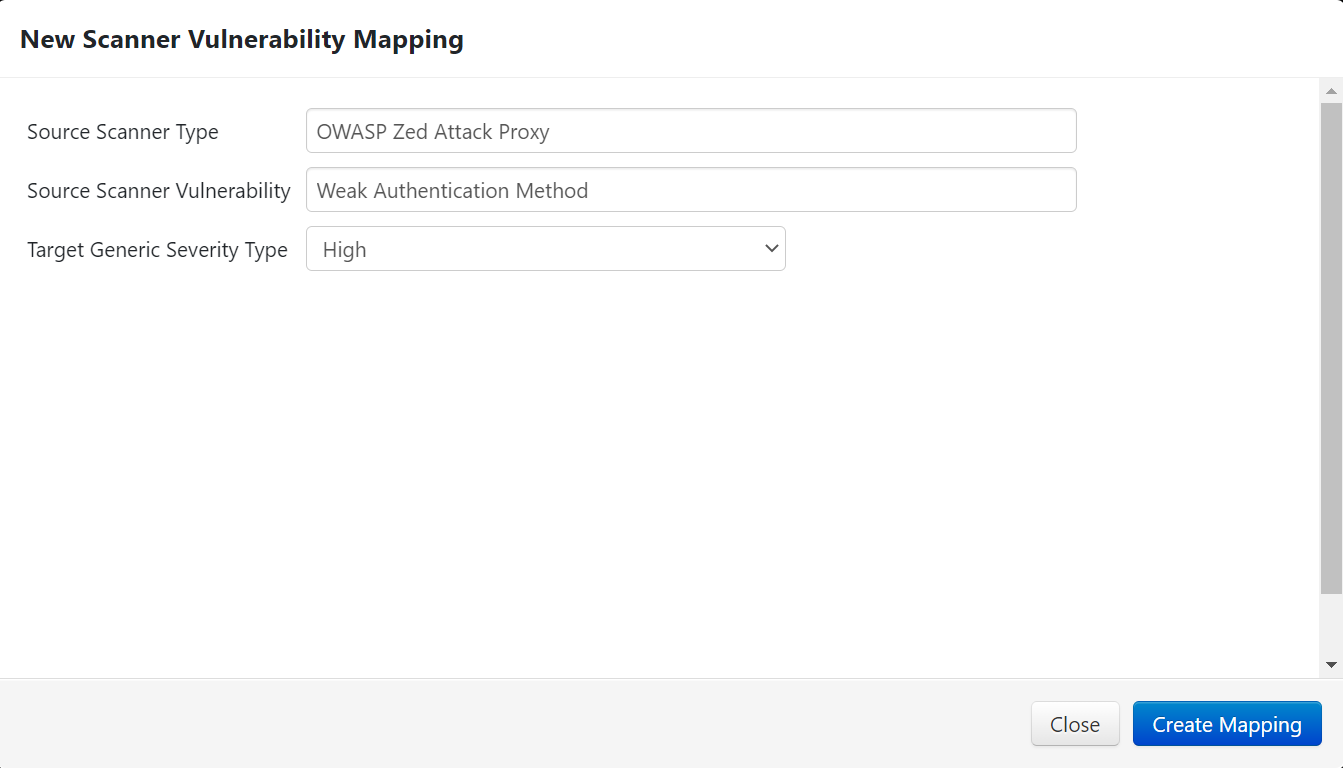
This will bring up a dialog to map
a scanner vulnerability to a severity type.

*Note: prior ThreadFix versions may display Deny/Allow List as Blacklists/Whitelists.
Begin typing in
the Source Scanner Type
field. A
drop-down menu will populate with supported scanners matching the letters typed. Select
a scanner from the list.
The example below shows OWASP ZAP (Zed Attack Proxy) as
the chosen scanner.

Type in the scanner vulnerability
to remap.
For this
example the source scanner vulnerability
is Weak Authentication Method.

Select
a Target Generic Severity Type
from the dropdown list. The
example below shows Weak Authentication Method
and has a severity
of High.
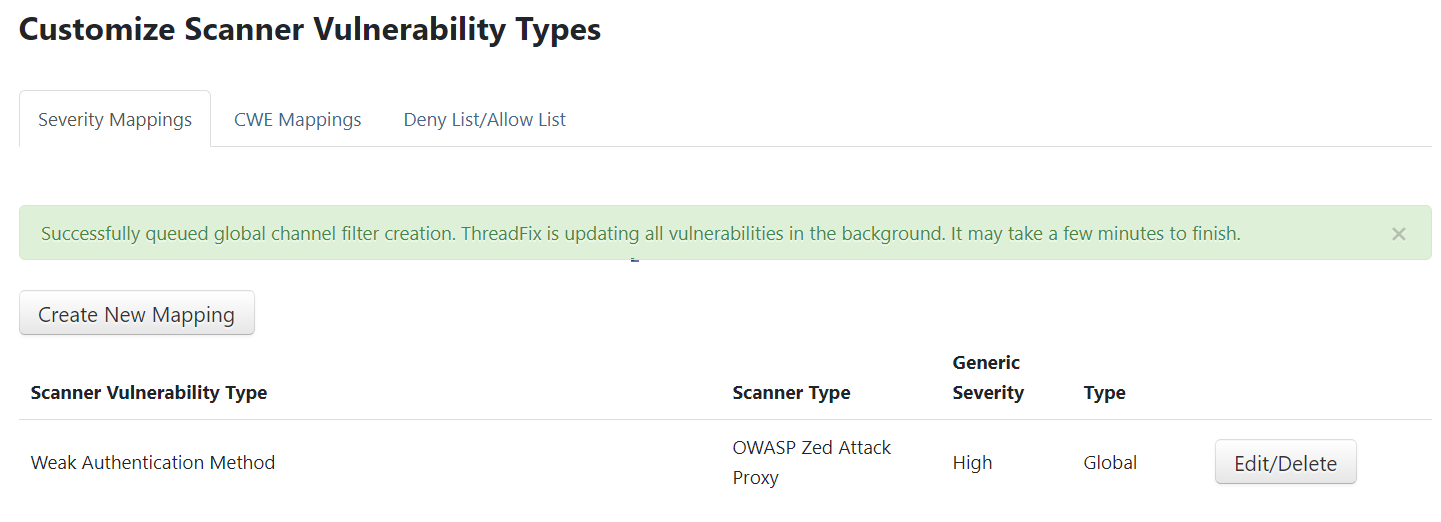
Click the Save Changes button. You will then see a success message, and your new mapping displayed.

| Note |
|---|
If you select the Ignore severity for a particular Scanner/CWE combo, all corresponding vulnerabilities will be hidden, i.e., they will not appear in any vulnerability tree nor count toward vulnerability counts. |
Click the Create Mapping button.
A success message will display along with the new mapping.
CWE Mappings
CWE Mappings allows users with Manage Vulnerability Types permission to manually map scanner vulnerability types.
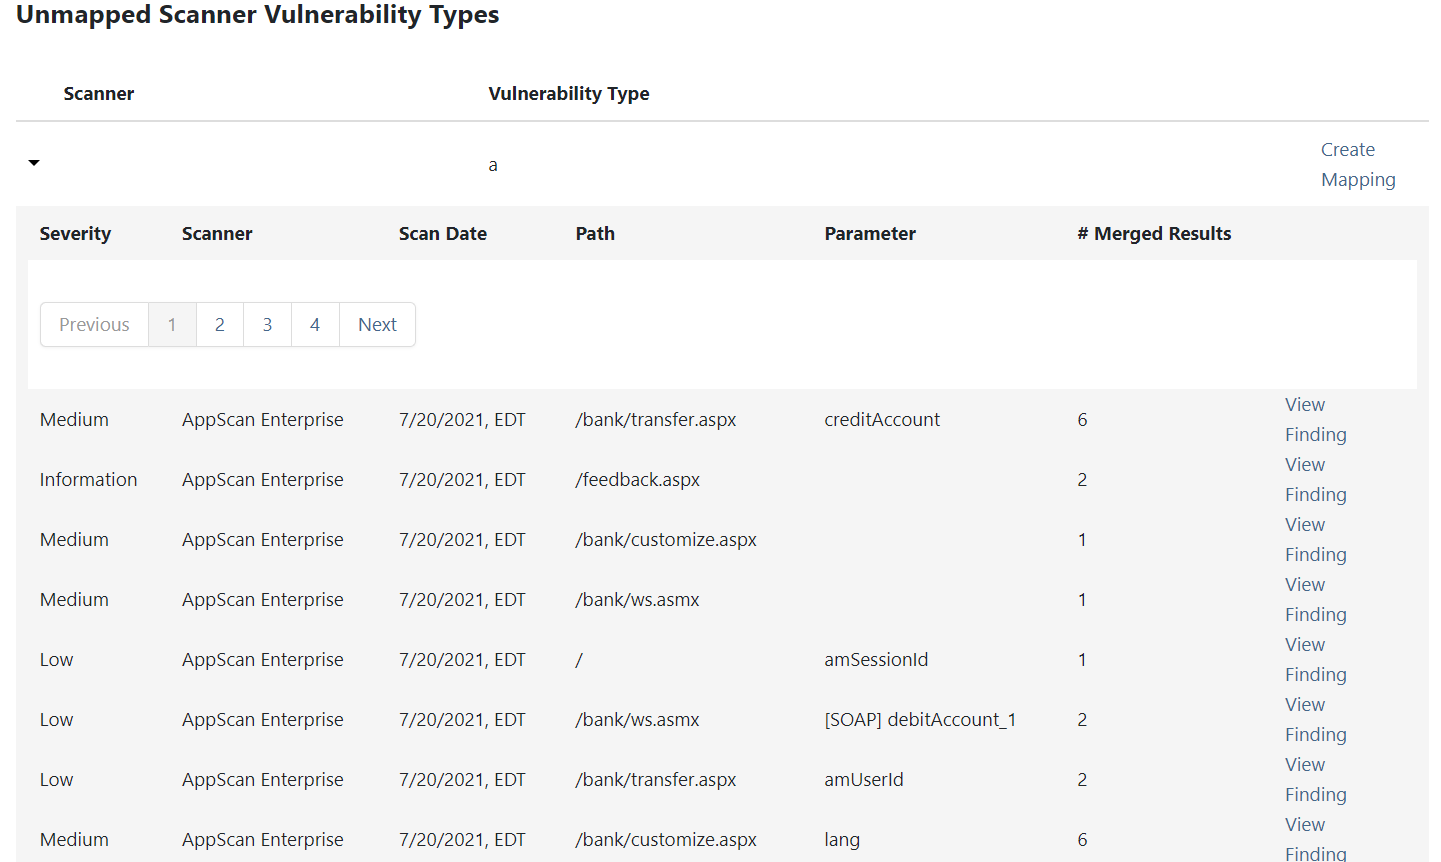
Select the CWE Mappings tab to display Unmapped Scanner Vulnerability Types. The following example displays a scan with unmapped vulnerability types following a scan upload to an application.
.png?version=1&modificationDate=1663626309597&cacheVersion=1&api=v2)
To manage unmapped vulnerabilities, first select a desired scanner to map and click the Create Mapping link. This will pop up a Create Mapping modal. Note the scanner can also be expanded to view details for the scanner; clicking the View Finding link will redirect to its Finding Details page which contains an Edit CWE Mapping button allowing for the same mapping function.
From the Create Mapping modal, begin entering a CWE into the entry field and select the desired CWE.
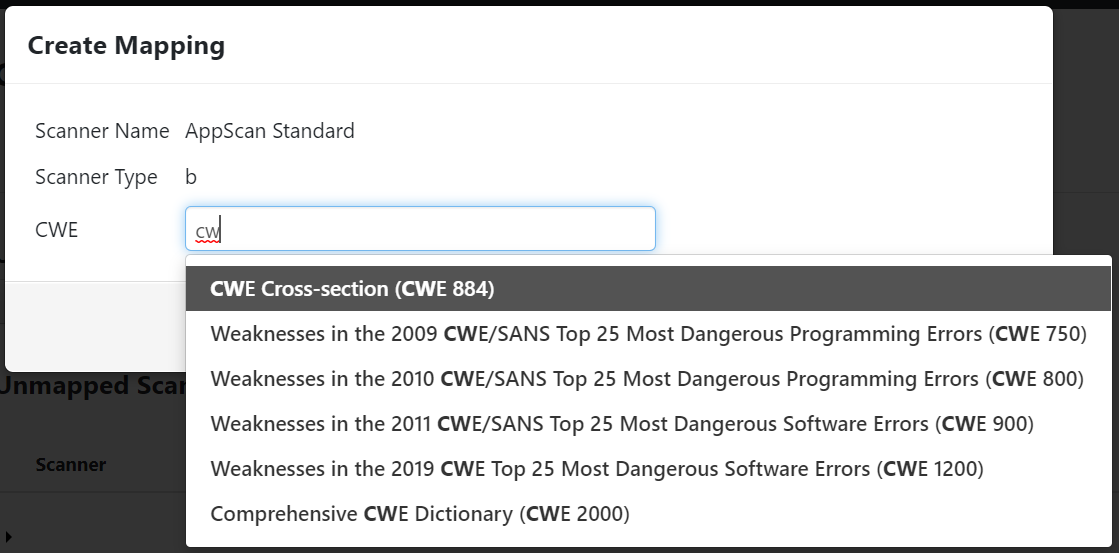
Click the Create Mapping button.
.png?version=1&modificationDate=1663626309617&cacheVersion=1&api=v2&width=374)
The scanner vulnerability type will now be added to the list of Custom Scanner Vulnerability Type Mappings. The Edit Mapping link brings up the Create Mapping modal to allow it to be remapped.
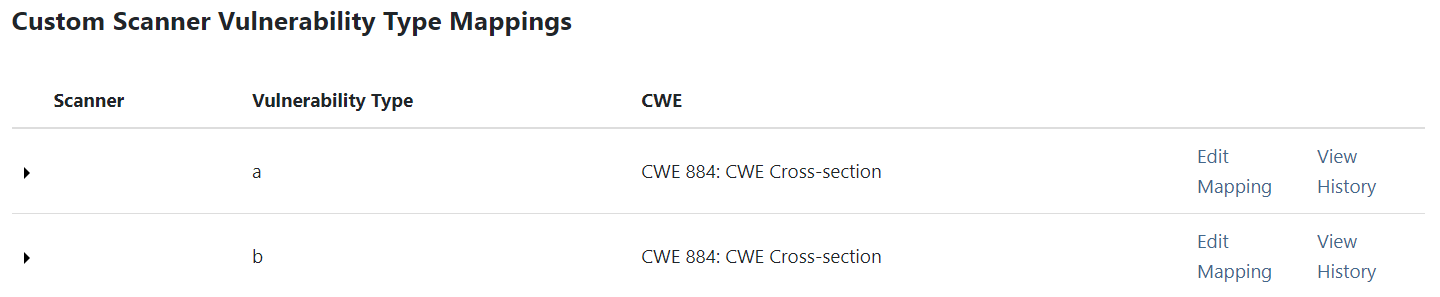
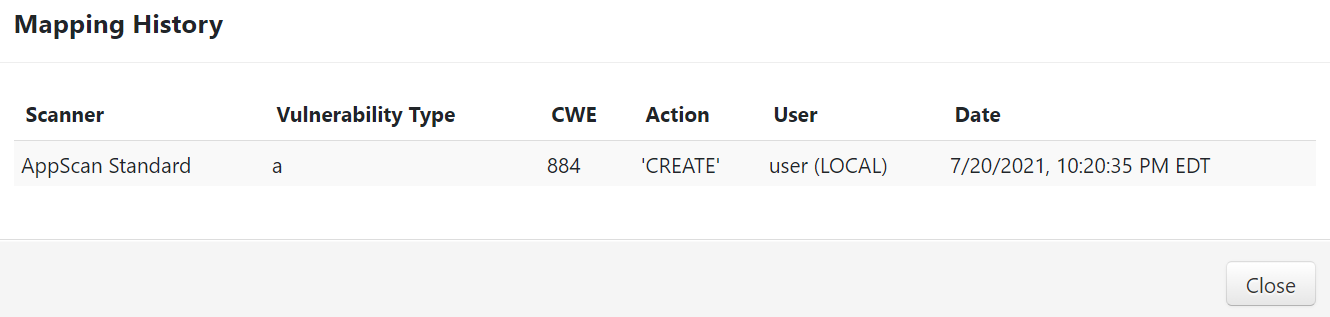
Clicking the View History link will display a Mapping History modal.
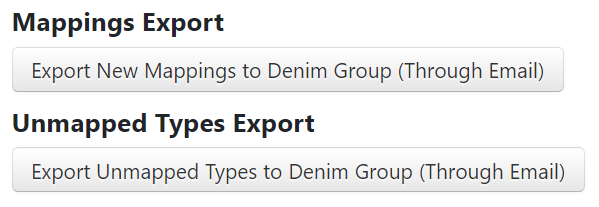
From the top of the CWE Mappings tab, mapped and unmapped type reports can be exported by email with their respective button.
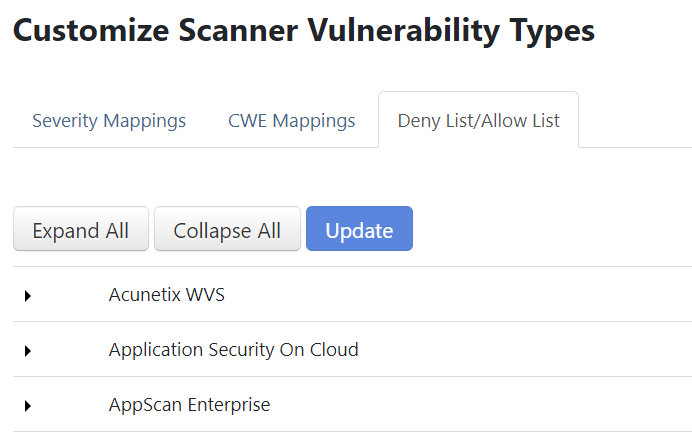
Deny List/Allow List
On a per-scanner basis, you users can exclude specific scanner vulnerabilities (deny list) or limit which scanner vulnerabilities are allowed (allow list) when ingesting scans.
Select
the Deny List/Allow List
tab and select a scanner to add or remove from a Add to Deny List
or
Add to Allow List
button, depending on which mode is selected
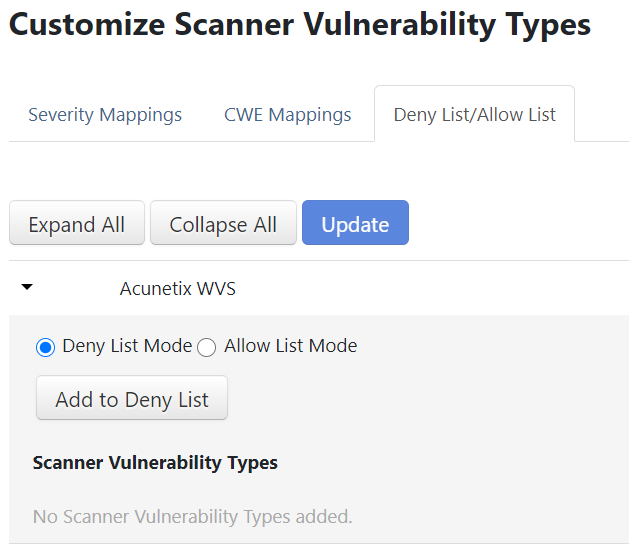
. Deny List Mode is the default

.
Note the example scanner chosen below and the radial buttons for Deny List Mode and Allow List Mode. For this example, click the Add to Deny List button.
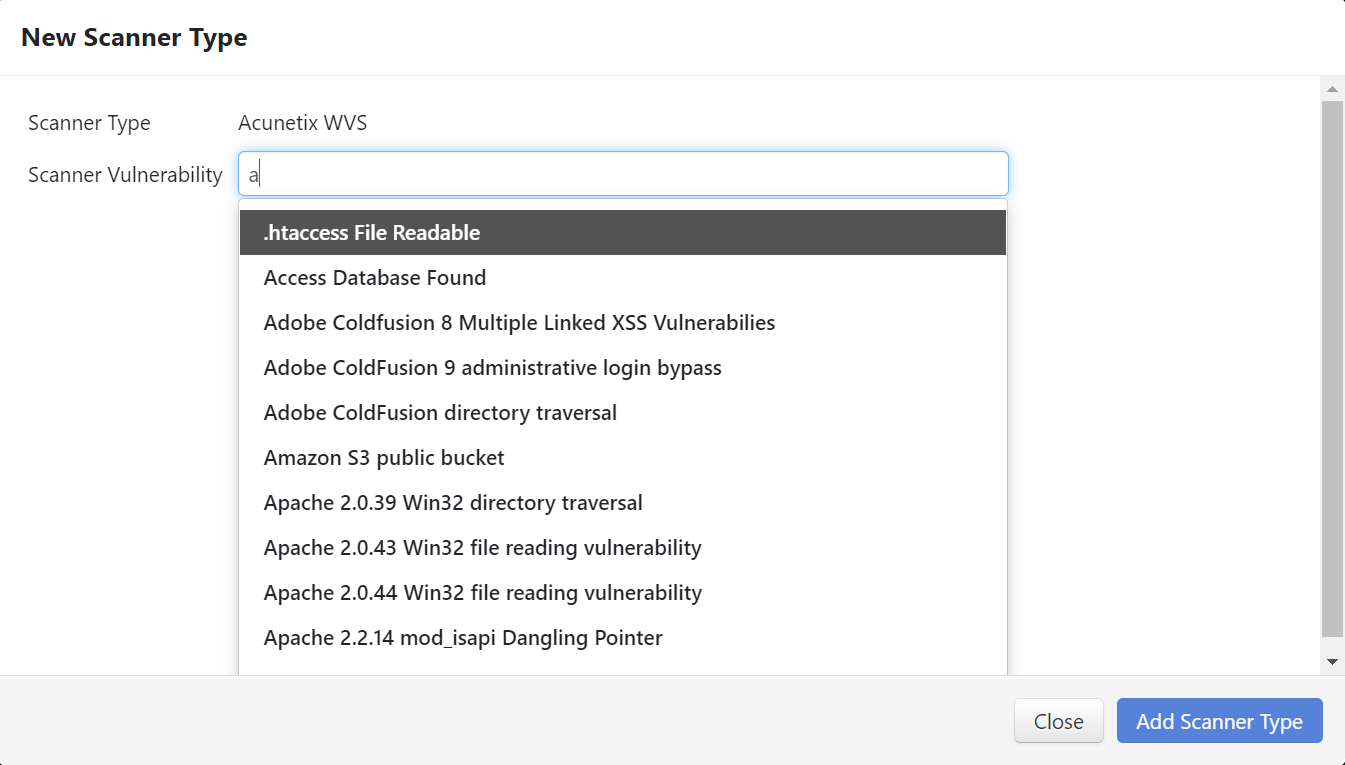
Begin typing a scanner vulnerability, select the desired one, and click the
Add Scanner Type
button.

The vulnerability will be added to the Scanner. Edit or delete the filter afterward, if desired, using the 'Edit/Delete' button.

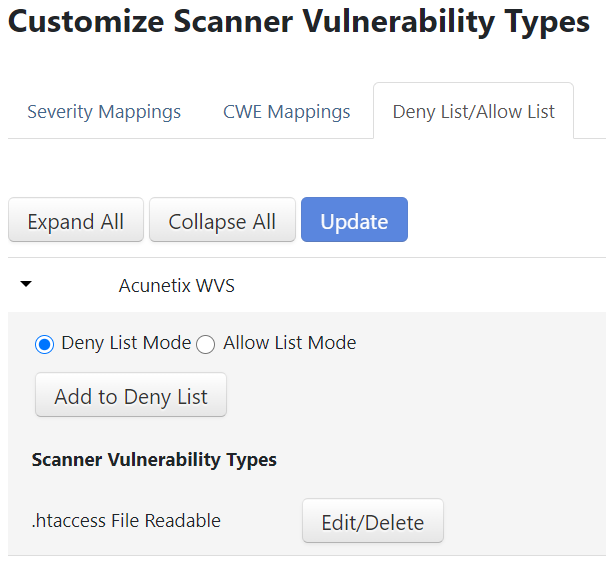
Table of Contents
| Table of Contents |
|---|