📙 You will learn
How to open/create, configure, launch, export, and upload an AppScan Enterprise scan.
Prerequisites
Audience: IT Professional or End User
Difficulty: Basic
Time needed: Approximately 10 minutes
Tools required: N/A
Generate Results
After navigating to a deployed instance of AppScan Enterprise, an application must be setup to assign scans
...
...
...
Navigate to
...
...
...
...
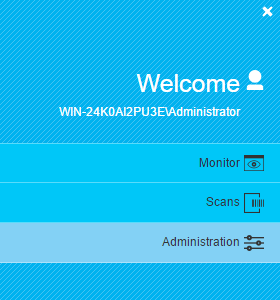
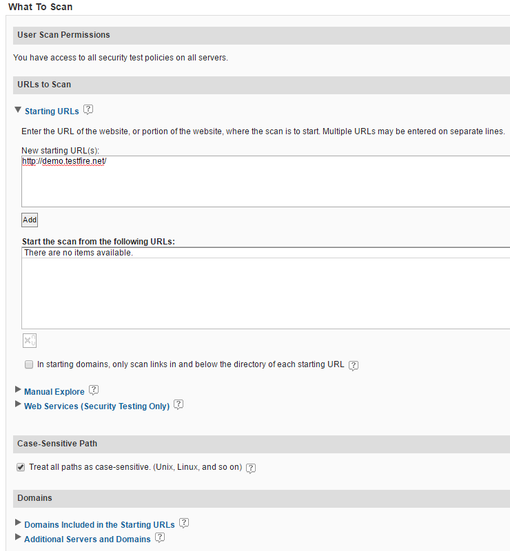
Select
...
...
...
Use the defaults provided by AppScan
...
...
...
...
...
...
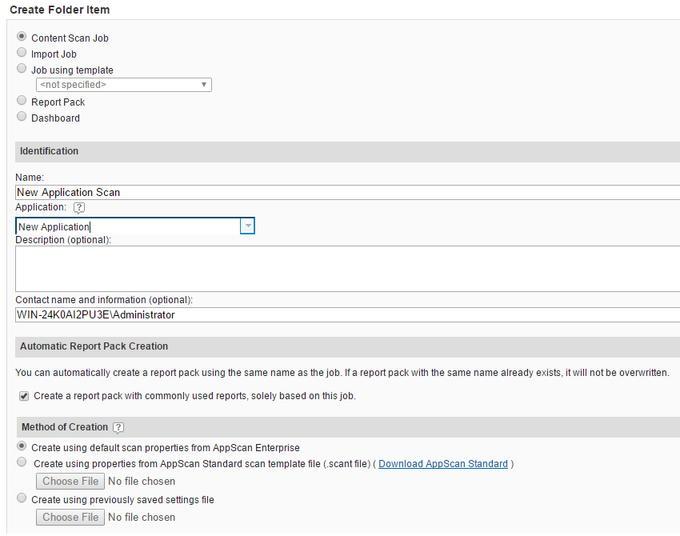
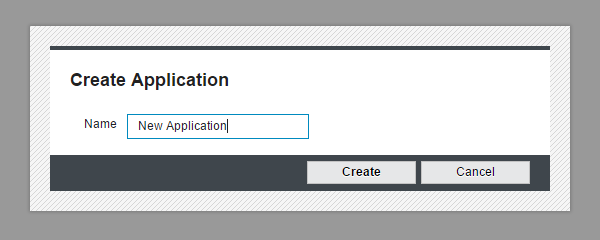
Fill
...
...
...
click the Add button and select Apply.
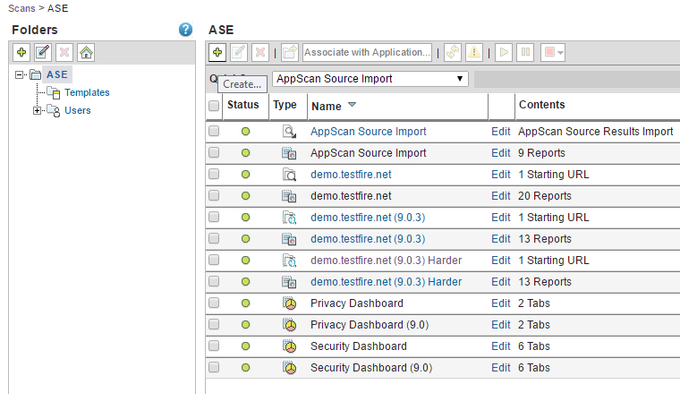
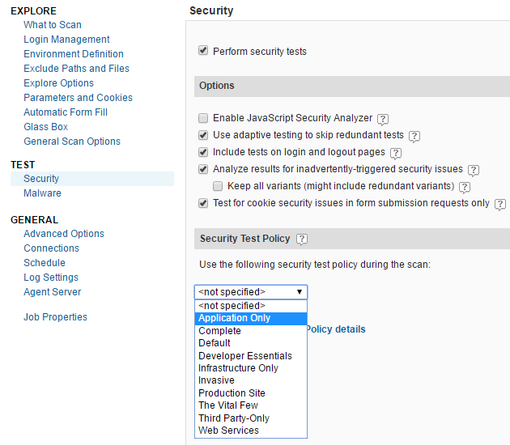
Navigate to
...
...
...

Select the Security Test Policy that fits the target application(Application Only is a good choice as a default) and select Save:
...
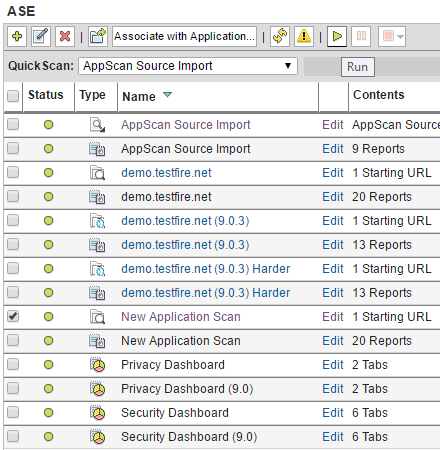
Select the newly created scan job's checkbox and
...
click the
 button to run the scan
...
...
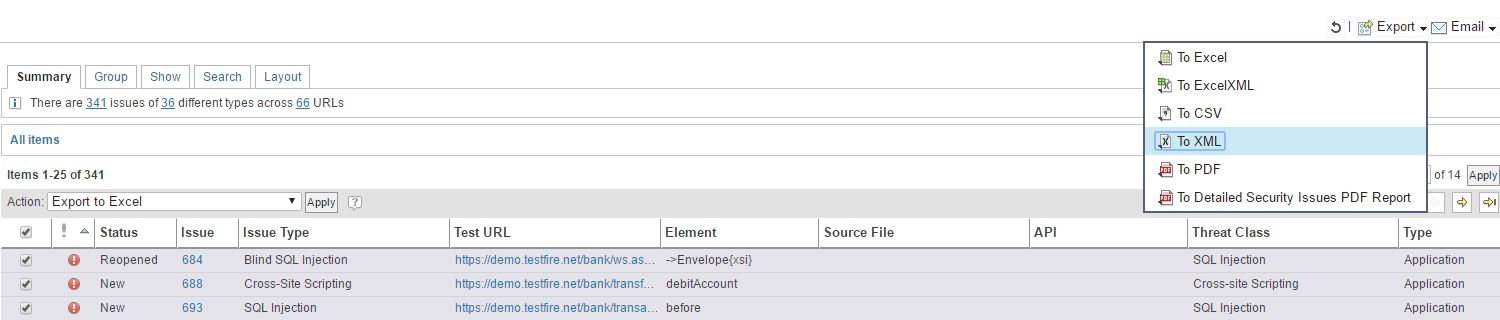
After the scan job completes, select the Report Pack job.
Select all the issues by checking the top checkbox and select Export → To XML and save the file to the desired directory:
...
Upload Results
It's recommended to use the Remote Providers feature to import AppScan Enterprise Scans into ThreadFix.
After generating the report, log in to ThreadFix and navigate to the Teams tab. Expand the Team that the report will be uploaded to:
...

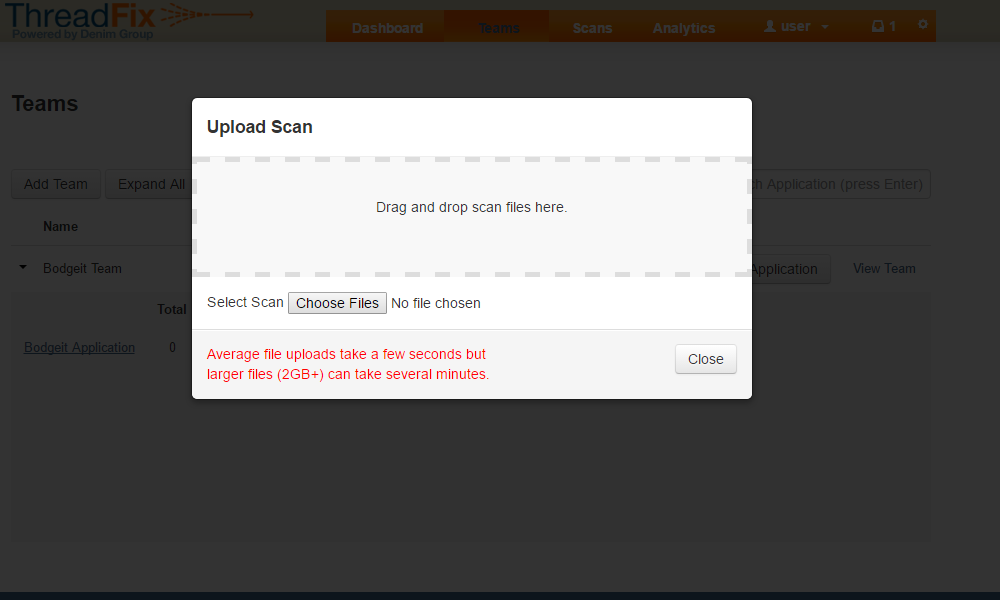
After picking one of the Team's Application, select Upload Scan and drag the report into the Pane:
...
Once ThreadFix has finish processing the report, the results can be viewed on the Application's page:
...
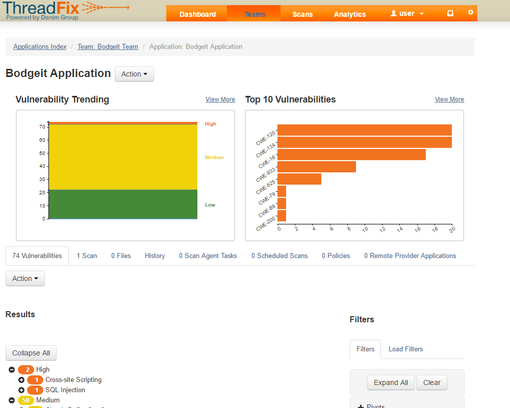
Table of Contents
| Table of Contents |
|---|